Tofu and Vegetable Stir Fry + Easy Almond Butter Sauce

IMG_3863

I promise to get to the stir fry in a second, but first a little bit of self-reflection never hurt anyone 😉

Let’s talk friends, i.e. the family that you choose for yourself, the tribe you willingly associate yourself with, the group of people who serendipitously come into your life (and sometimes back into your life), a network of people that grows roots and supports you through thick and thin. I’ve been compelled to reflect on my friendships these past few weeks – for a variety of reasons, some incredibly good and some quite unsettling. Luckily for me the unsettling bits did not originate from within my circle, but nevertheless I have been one of the affected bystanders hit with a storm of betrayal and lies. All I can say is that I am one fortunate woman to have the friends that I have. More than fortunate. Blessed, in fact, if I may use this clichéd and worn-out, hashtagged to death remark. But it hasn’t always been like this.

About five years ago I ended a very long term, depleted relationship; and even though its conclusion was far overdue and inevitable, it still left me reeling and feeling lost. At that time I had a couple of genuine friendships and a handful of tenuous ones. As I recovered and adjusted to the aftermath, I engaged in new hobbies, rediscovered forgotten ones and started making connections  with people from all walks of life. In the midst of this flurry of new faces, I found those that have now solidified into friendships that I deeply treasure. I’m not gonna lie, it wasn’t easy for me at first. Over a decade since high school graduation (where I was a shy and reserved creature) I wasn’t sure HOW to make friends. Sounds ridiculous, right? But I wager that many adults just aren’t sure how to navigate the friend-making landscape. It gets a bit more complicated once you’re past the point of playing in the school yard, where a short recess spent kicking a ball around or playing hopscotch leads into the best-friends-forever realm. In any case, I guess somehow I figured it out. Five years later I am surrounded by people that make me a better person. And that’s the ultimate jackpot right there. The friendships that I have made over the last few years, as well as those that have endured the growing up years, have shown me how to be a more caring, empathetic, authentic, giving, loving, generous person. I am still learning and VERY much a work in progress. But as I reflect on the me pre-big-life-changing-breakup to the current me, it still astonishes me how much I have changed. And entirely (mostly) for the better. And all because of my tribe. I mean these people who willingly spend time with me are selflessly taking care of sick family members, raising smart and kind children, organizing care packages for those in need of a pick-me-up or some extra TLC, volunteering in their communities, reaching out to those who are isolated, and tirelessly setting an example of what a good human being should look like. It is impossible for some of that not to rub off on me. Like glitter off a princess Barbie, that stuff really sticks! And so I am grateful, and thankful, and blessed, and indebted to the universe for my friends. How did  I ever get so lucky.

And now for a clever segue to this stir fry. Well, I guess just like my friendships, this dish is uncomplicated, nourishing, deeply satisfying and rich in flavour. Kind of proud of what I just did there. Okay, please don’t leave. I promise I’m done now.

This recipe is a more formalized version of something that I have  been cooking for years – except that in the past I would just throw a bunch of dashes of this and that straight into the pan and somehow it would turn out. But people want numbers and proportions and so I nailed it down for you!

IMG_3851IMG_3855

It really is a pretty simple and versatile recipe. Sub in whatever veggies you like  – mushrooms, peppers and baby corn would work beautifully. But I am partial to the sponge-like quality of broccoli which tends to hoard the tasty sauce within its abundant tendrils. Whatever veggies you choose, add the ones that cook longer first, a few minutes ahead of the others. You can easily make the almond butter sauce nut-free by subbing in tahini. If you like garlic, add some of that in along with the ginger – I’m  not a garlic-hater, but I choose to do the least amount of chopping per any recipe I make. I am chopping averse. Or maybe I just like quick recipes. 

Please let me know if you make this!! You could even just make the sauce and slather it onto whatever food you please. Like friendships, this sauce makes life better…okay, here’s the recipe finally. Who lets me write anyway?

IMG_3895

Simple Veggie and Tofu Stir Fry + Almond Butter Sauce

Serves 3-4

Prep Time 15-20 minutes

Cook Time  20 minutes

Ingredients for Stir Fry:

1 block of extra firm tofu, cubed

1 Tablespoon coconut oil, or other neutral tasting oil

1-2 Tablespoons minced fresh ginger, to taste

2 Tablespoons water

2 Tablespoons tamari

1 bunch of broccoli or cauliflower, trimmed and cut into bite-sized florets

3 carrots, peeled and sliced into desired shape

2 zucchini, sliced into desired shape

Ingredients for Almond Butter Sauce:

4 Tablespoons roasted almond butter (may be substitutes with natural peanut butter, or tahini for a nut-free version)

4 Tablespoons freshly boiled water

2 Tablespoons tamari sauce

3 Tablespoons natural rice vinegar

1 teaspoon maple or agave syrup

1 teaspoon red pepper flakes (optional)

 Directions:

1. In a large non-stick sauté pan or wok, heat coconut oil over medium-high heat. Add cubed tofu and cook, stirring often, until golden brown on most sides, about 10 minutes. Remove from pan onto a plate.

2. Reduce heat to medium and to the same pan add minced ginger, 2 Tablespoons tamari sauce, 2 Tablespoons water and broccoli or cauliflower. Stir well and cook 3-5 minutes. Add carrots and zucchini and cook 5 more minutes.

3. While vegetables are cooking, in a medium bowl whisk almond butter and freshly boiled water with a fork until smooth, add the rest of the ingredients and whisk until combined. Adjust to taste.

4. Add almond butter sauce to the vegetables and stir to combine. Add tofu back to the pan, stir and cook 1-2 more minutes until flavours meld together. Enjoy!

IMG_3897

Indian Spiced Chickpea Skillet Cake

img_3714-4

Here in Southern Ontario, the Greater Toronto Area to be exact, we experienced what is akin to a heat wave in winter this past weekend. Temperatures in the (low) double digits (Celsius that is) warmed our bodies and our souls and an abundance of sunshine made everything seemed brighter. Sigh, we collectively needed this! Or at least I needed this. Days like this weekend remind me that everything is going to be okay. Life will be okay. More than okay! Spring is around the corner, we just have to hang in there for a few more weeks.

You know what else warms the body and soul? Spicy, flavourful, easy dishes made with nourishing ingredients. You might have noticed that I love spice. A lot of spice. Like, all the spice in the world. And by spice I mean spices AND heat. In my world, the hotter the better. It’s like an addiction and I often crave spicy foods. My sister gets me. She’s just the same.

img_3718-3

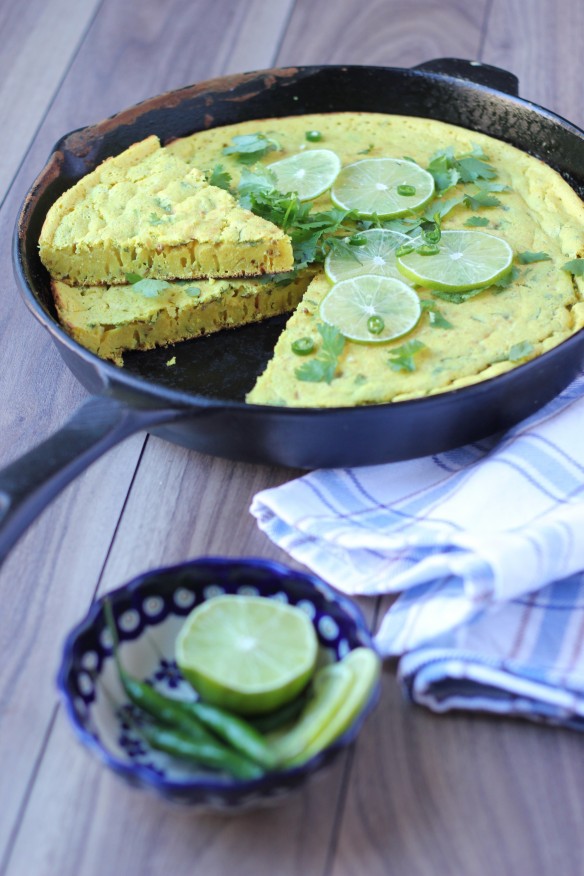
In this spiced chickpea skillet cake the spice comes from some wonderfully robust Indian inspired spices like cumin seeds and fresh ginger, as well as from green chilies which you can dial up or down based on your preferences. You can guess which direction I went! This skillet cake is modelled after an Indian dish called dhokla, if only in flavours and ingredients, not actual execution. Traditional dhokla requires a pressure cooker to make and yields a spongy, super light savoury cake. Like a cloud in your mouth! I rely on baking powder to help achieve a bit of this airiness, though my recipe creates something much more dense and filling. In any case, it’s taste is reminiscent of dhokla and that is all I can wish for. To make it a bit more traditional you could drizzle the finished skillet cake in black mustard seeds and chopped green chilies fried in oil. Alas, no mustard seeds in my cupboard and the stores were closed due to a holiday. I decided to go for it anyway!  

img_3706-2

I love using chickpea flour as it is super cheap (I buy it at a bulk store) and packed with fibre, protein and a host of micronutrients. One 1/2 cup serving of chickpea flour (also known as garbanzo flour or besan) provides you with 10 grams of protein and 5 grams of fibre, as well as about half of your daily folate and a quarter of your daily iron requirements. Please ask me where I get my protein from the next time you see me. It’s also naturally gluten-free (though if you have Celiac disease please buy it in sealed packages!)

Please excuse the seemingly long instructions but I get chatty. And also I needed to explain how I MacGyvered my skillet to have a snug lid to fit over top of it. Yup, using skills in the kitchen!

img_3720-4img_3738-3

Indian Spiced Chickpea Skillet Cake

Serves 4-6

Prep Time 15 minutes

Cook Time 10-13 minutes

Ingredients:

2 cups chickpea flour

1 Tablespoon baking powder

1/2  teaspoon ground turmeric

3/4 teaspoon sea salt

Freshly ground black pepper

2 cups water

2 Tablespoons fresh lime juice (from 1 small lime)

1/4 cup roughly chopped fresh cilantro, packed

1 Tablespoon neutral-tasting oil (avocado, canola, grapeseed, refined coconut)

1 Tablespoon cumin seeds

1 teaspoon coriander seeds (optional)

1 Tablespoon finely minced fresh ginger

1-2 chopped green chilies, leave seeds in

Garnish: chopped fresh cilantro, sliced green chilies, lime

Directions:

1. In a medium mixing bowl, whisk chickpea flour, baking powder, salt and pepper to combine. Add water and lime juice and whisk well, ensuring batter is smooth and lump free. Set aside.

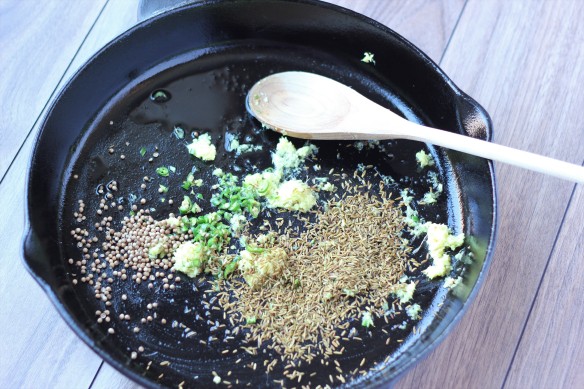
2. Choose an oven-proof, non-stick frying pan or well seasoned cast iron skillet, for which you have a tight fitting lid (I used a lid from a large stock pot and used a couple of pieces of tin foil to plug the gaps along the rim of the skillet). Heat oil over medium-high, then add cumin seeds, coriander seeds, ginger and chilies. Fry, stirring often, until fragrant and seeds begin to pop,  about 1-2 minutes.

3. Add fried spices, ginger and chilies to chickpea batter and whisk in. Don’t worry if you don’t get every seed and bit from skillet. Place skillet back on the stove and turn heat down to low. Carefully pour chickpea batter into the skillet and cover with the lid (no peeking – the key is to allow steam to build up and help in cooking the cake.) Cook over low heat for 6-8 minutes, until bubbles appear on surface and mixture starts to set (you will notice the top of the cake will start to dry out and become less jiggly.) Be careful not to burn the skillet cake! Low heat is key here. While cake is cooking on the stove top, set oven on to broil.

4. Once batter is mostly set, remove from heat, remove lid and place skillet on middle rack and broil for 2-3 minutes. Watch carefully to ensure skillet cake does not burn! This is not the time to walk away and start a new task. Carefully remove skillet from the oven (it’s hot!) and allow to cool. Once cool enough to handle, you can flip the  skillet cake out of the pan onto a serving plate, or serve straight  form the skillet. Top with desired garnishes. It tastes best when warm, so eat right away! Or store leftovers in the fridge and reheat before eating.

img_3763-2img_3760-2

And now for a PSA: Let me know if you make this recipe! Share with your friends! Like and comment below!

xo

Enjoy life and good food and sunshine,

ilona

Red Kidney Bean Curry (Rajma)

img_3414

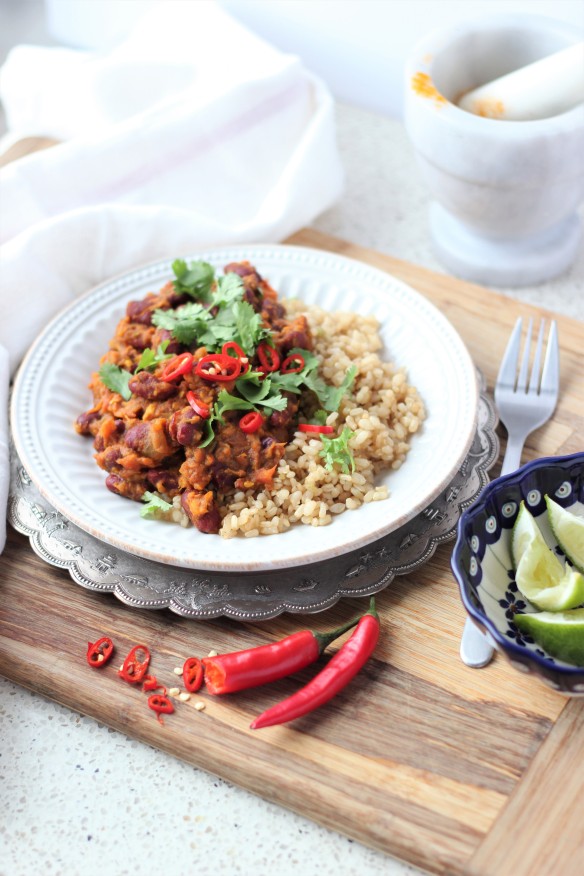
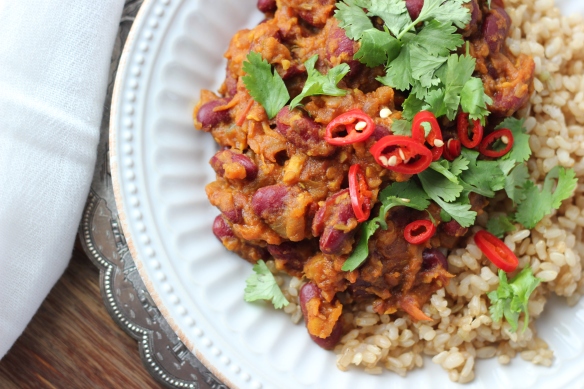
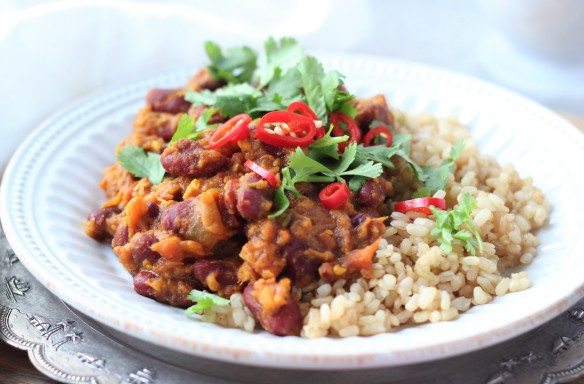
Sometimes life hands you lemons. Kernels of sourness. Little moments or truths or revelations that just make you pucker up and shake your head in disbelief. Like really universe? This is what you’re going to throw my way? You want to laugh and cry at the same time, on one hand feeling frustrated with the parade of disappointments, but on the other cherishing these moments for the inevitable memoir that will surely entertain the masses. In any case, I’ve learned that it’s best to take the Buddhist path in these instances – let go, live in the here and now and don’t sweat the future. Call up a good friend, shed a few tears, eat a cupcake, then laugh at the audacity of life. Good food helps. Especially a dish that warms from within to chase away the winter chill and nourishes your body with plant-based goodness that pairs plenty of exotic (but easy to find) spices with otherwise simple ingredients. This red kidney bean curry is known as rajma and hails from Northern India. Now let me qualify that a Polish-born Canadian girl making a very traditional Indian curry might take some  liberties with the recipe so this may or may not actually resemble what a real rajma looks or tastes like, but nevertheless I love (LOVE) the results. In fact, now that I think of it, I’m not sure if I’ve ever actually eaten authentic rajma. I’ve heard lots about it from friends and the families of South Asian decent that I counsel in my role as a dietitian (apparently rajma is a beloved dish for many children.) I’ve read and researched plenty of recipes when I decided to make my own many years ago – I can only guess at how close mine is to the real thing. In any case, as I said, the recipe that follows creates a beautiful, spiced dish that satisfies.

img_3375img_3362img_3357

Red kidney beans are part of the pulse family (which includes beans, peas and lentils) and Canada is the world’s second largest grower of this nutrient-packed bunch (right after India). Alberta, Saskatchewan, Manitoba, Ontario and Quebec grow hundreds of varieties and exports are a billion dollar industry! Talk about home-grown gold. Pulse Canada does an amazing job curating recipes, factsheets and lots  of great information about pulses – please check out their website. While 2016 was the Year of Pulses,  they are not going anywhere. In fact, pulses are gaining popularity and a larger share of the real estate on our plates. And this is no surprise really, they are incredibly cheap, versatile, brimming with protein and nutrients and hailed as a sustainable crop. The future is pulses! Did I mention the nutrients??

img_3269img_3312img_3299img_3328

I used canned kidney beans for this recipe but give dried beans a chance too. They just require soaking overnight, then a quick rinse and boiling the next day. Mostly idle work. I make big batches at a time then store in zip top bags in the freezer. Check out cooking guidelines for various pulses here. I should  also say give (dried) peas a chance as well. Hehe.  

img_3352

Red Kidney Bean Curry (Rajma)

Serves 4

Prep Time 15 minutes

Cook Time 30-35 minutes

Ingredients:

3 Tablespoons avocado oil, or other neutral tasting oil (grapeseed, canola)

1 medium/large sweet onion, roughly chopped

4-5 cloves of garlic

2 inch chunk of ginger, peeled

1 Tablespoon cumin seeds

1 teaspoon red pepper flakes or 1 Tablespoon finely chopped fresh red chile, or to taste

1 teaspoon garam masala

1/2 teaspoon ground turmeric

1/2 teaspoon ground coriander

1 teaspoon salt, or to taste

1/4 teaspoon freshly ground black pepper, or to taste

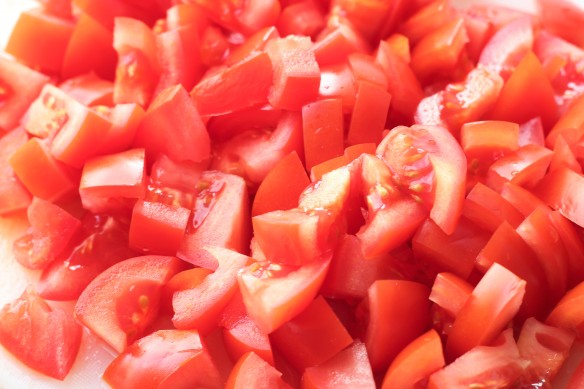
4 medium tomatoes, chopped

2 (19oz/540ml) cans of red kidney beans, drained and rinsed

1 1/2 cups water

Cooked grain of your choice (rice, quinoa, sorghum, millet) or flatbread, for serving

Chopped fresh cilantro, lime wedges and chopped red chile to garnish (optional)

Directions:

1. Add ginger and garlic cloves to bowl of food processor and process until finely chopped (about 30 seconds). Add onion to the minced ginger and garlic and pulse until chopped. Alternatively, if you don’t have a food processor, mince ginger and garlic, and finely chop onion with a knife.

2. Heat oil in a large saucepan on medium heat, add ginger, garlic and onion and cook until soft and translucent, about 3-5 minutes.

3. Add in cumin seeds, red pepper flakes or red chile, garam masala, turmeric, coriander, salt and pepper, stir to combine and  cook until fragrant, about 1-2 minutes.

4. Add in chopped tomatoes, including any juices, stir to combine, and simmer uncovered for about 15 minutes, stirring often, until liquid has mostly evaporated and the oil starts to release from the mixture. Reduce heat to medium-low if mixture starts to bubble too fast and sticks to the pan.

5. Add in kidney beans and water, stir to  combine, cover with lid slightly askew (to allow steam to escape) and cook for about 8-10 minutes until curry thickens, stir from time to time to make sure curry does not stick to the bottom of the pot. Take off the heat. If desired, using a potato masher, mash some of the kidney beans in one corner of the pot; this will thicken the sauce a little bit while keeping most of the kidney beans whole.

6. Serve with cooked grains or flatbread and garnish with toppings as desired.

Tips:

You can add more water to the curry after the last step if you prefer a thinner consistency.

You can buy all the spices at a bulk store if you prefer to buy smaller amounts.

img_3364

img_3423

Eggnog Nicecream + Gingerbread Chocolate Sauce

img_2965

Some days I sit down to write a blog and know exactly what I want to say. Some days, like today, I have  no idea. My mind is blank. Or maybe not blank, but all the ideas I hold within are blunt and vague instead of sharp and focused. And so I am not writing with the fervour of wanting to spill words onto the page at break neck speed lest they disintegrate. This kind of a writer’s block scenario requires a bit more introspection. What do I really want to say? And so I settle on the truth.

Life has tossed a few obstacles on my path recently, both health and relationship wise. I have taken to yelling at the universe to stop being such an a**hole from time to time while trying to scramble over said obstacles  more or less intact. It is not a graceful process. There’s tears and pain and scars. But I am more than fortunate. I have an abundance of comforts and great friends and family to help me along the way. And I also have the opportunity to set aside time, energy and resources for self-care. I have been listening to my body and doing more yoga, going for hikes and listening to energizing and inspiring podcasts. I have been spending time with my nieces and nephews – talk about therapy! They bring me crazy amounts of joy and their giggles are pure magic. I am also just trying to give myself over to the process. Whether it be health or relationships or career, I have to trust that it WILL all work out. Perhaps not in the way I pictured or wished for. But in some way or another it will be okay. I imagine a crossroads up ahead where luck and hard work will intersect and I achieve what I am striving for. I just have to keep my eyes open and be willing to flex and bend and yield.

Now, I don’t have a witty or thoughtful segue to this recipe so…..gingerbread!!

img_2962

Gingerbread was the inspiration for this recipe. Gingerbread and eggnog. Essentially, I am in full on Christmas mode and wanting to devour the sights, sounds and flavours of the season at any chance possible. It started with making multiple batches of peppermint bark for gatherings in recent weeks, checking out the Milton Santa Claus Parade last weekend and  then going  to the Trans Siberian Orchestra with my family a few days ago. The Christmas spirit has been ignited. 

img_2907img_2958

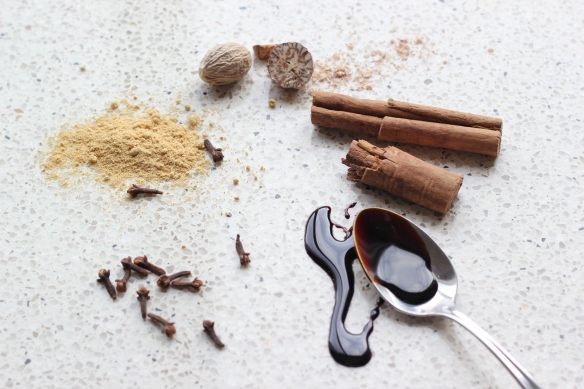
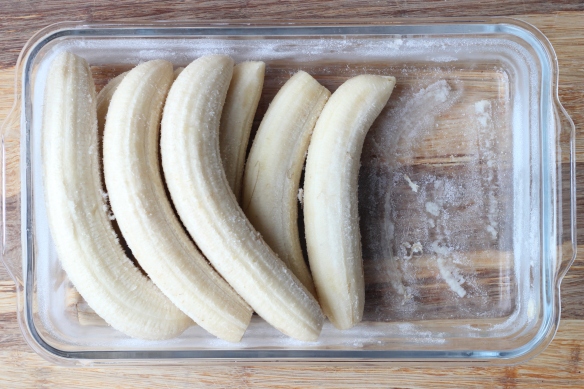
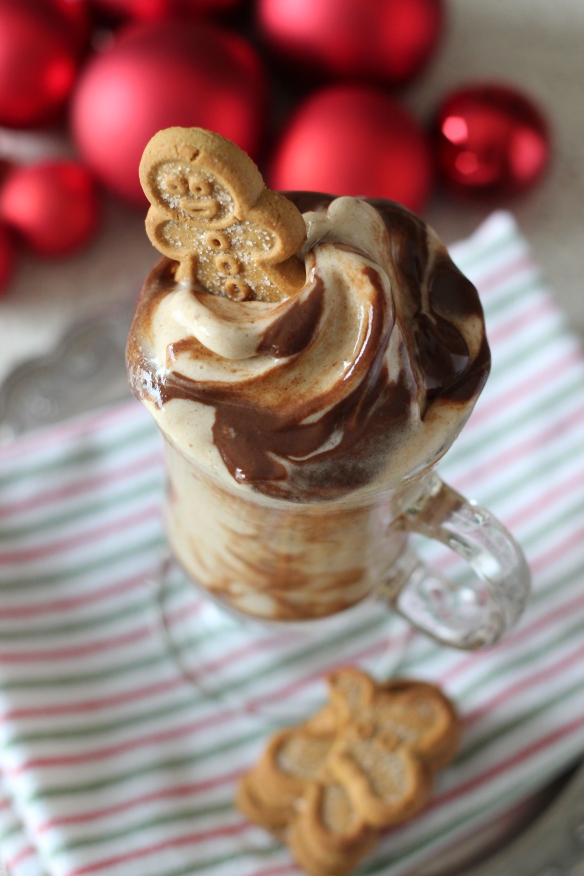
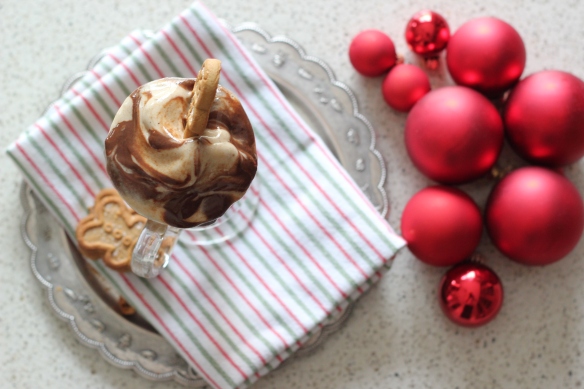
This is called nicecream because in using only plant-base ingredients it’s a kind way to consume  ice cream without using dairy milk. And it’s nice. Really really nice. And kind of magical, because who knew that frozen bananas can yield something smooth and creamy and cold and so akin to real ice cream that you might not miss the real thing. And it’s also super healthy, because it’s  just fruit! I paired the nicecream with eggnog flavours and topped it all with a gingerbread chocolate sauce, which is a gingerbread-spiced version of my original chocolate sauce. I haven’t posted the recipe for the original sauce on this blog yet but people went nuts about it when I shared it on Instagram and Facebook. I guess people care about a chocolate sauce that is free from refined sugar, made from wholesome ingredients and versatile (you can use it as a fruit dip, on top of oatmeal, as a base for hot chocolate etc.) And because it’s chocolate. This version is filled with gingerbready spices and molasses – I use the blackstrap variety because they are a good source of iron and calcium, unlike other types of molasses. So there you have it, chocolate, eggnog, gingerbread, nicecream, Christmas. Enjoy!

 img_2975img_2999


Eggnog Nicecream with Gingerbread Chocolate Sauce

vegan, gluten-free, soy-free, refined sugar-free 

Makes 2 servings of nicecream +  approximately 1 1/2 cups of chocolate sauce

Prep Time 10 minutes

Ingredients for nicecream:

4 ripe bananas, frozen, roughly chopped

1 teaspoon pure vanilla extract

3/4 teaspoon ground cinnamon

1/2 teaspoon freshly grated nutmeg

small pinch of ground cloves

1 Tablespoon maple syrup optional)

Directions:

1.       Add bananas and vanilla into a food processor and process until a creamy, soft-serve ice cream consistency . This will take a few minutes, and at first will resemble a coarse, crumbly mixture. Keep processing and scraping down sides often until you get nicecream. Add spices and maple syrup (if using) and process for a few seconds until combined.

2.       Spoon into serving dishes, top with gingerbread chocolate sauce and enjoy right away.

Ingredients for the gingerbread chocolate sauce:

8 soft medjool dates, pitted

6 Tablespoons cocoa or cacao powder

1 Tablespoon virgin coconut oil

1/2 teaspoon pure vanilla extract

1 Tablespoon blackstrap molasses

1/2 teaspoon ground ginger

1/2 teaspoon ground cinnamon

1/4 teaspoon freshly grated nutmeg

1/8 teaspoon ground cloves

pinch of sea salt

1 cup warm water

Directions:

1.       Place all ingredients in a blender and blend until smooth.

2.       Store in an air tight jar in the fridge for up to one week. The coconut oil might solidify in the fridge, just heat in the microwave or by running sealed jar under hot running water to melt.

Notes:

I keep a stash of whole, frozen bananas in the freezer; they break up or chop easily even when frozen. You want them to be ripe, with black spots on the skin (but not mushy or brown inside) when you freeze them.

I used Mi-Del gluten-free Gingerbread Men for decoration. So adorable!

img_3012

Harvest Kale and Roasted Butternut Squash Salad with Creamy Maple-Cider Dressing

img_2630

Here’s what I know about kale. It is hardy. It stands up to a greater breadth and depth of temperature, seasons and wind than any other vegetable in our garden. It thrives far longer (it continued to spill its harvest into the frigid mornings of mid-November.) It nourishes and satiates. It gives and weathers and feeds. And it needs little sustenance in return. Talk about a superfood with super powers! What I also know about kale is that I’ve been eating it for FAR longer than it has been basking in the glowing light of superfood status. My grandmother, aunts and mom have been growing and using kale in their kitchens for as long as I can remember. And while I don’t think they ever imagined its dominance as the queen of greens, they certainly knew its value. Easy to grow. Easy to cook. Easy to transform.

img_2599

img_2609

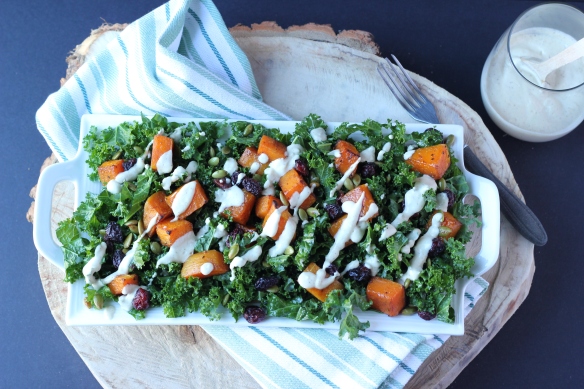
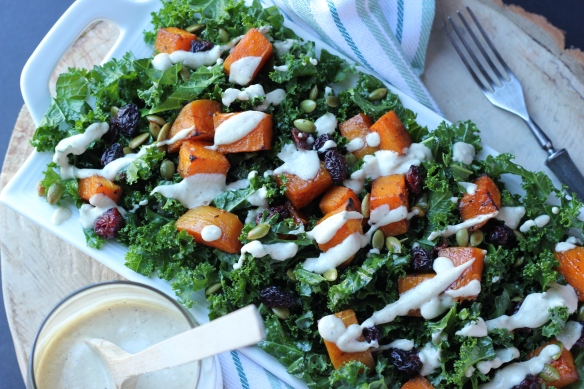
Onto this glowing recipe. Kale salad is nothing new. I’ve been making versions and incarnations of it for many years. Sometimes as the star player and sometimes as a companion to other greens. This salad though is all about the kale. It is home-grown kale paired with classic autumn ingredients to create a hearty, addictive and delicious appetizer or meal. I do highly recommend massaging the kale for this dish. Yup, that sounds ridiculous, I know. But really, it makes a difference. If you’ve ever had dry, woody kale in your salad you will appreciate this step. And doesn’t this hard working produce staple deserve a little R and R?? You’re welcome kale.

img_2652img_2640

The first few times I made this recipe I used delicata squash which works beautifully. But as luck would have  it, delicata was nowhere to be found on my grocery expedition this time. So butternut squash played the perfect understudy. And really any squash or pumpkin would do. I do love serving this salad with the squash still warm from the oven. The warmth is a great foil for the kale and sets off the zingy dressing nicely, but room temperature is just fine. Straight from the fridge the next day works too. And yes, this salad is the kind you can eat as leftovers, nothing gets soggy!

img_2680

I usually serve all the ingredients layered on a large platter or wide, shallow bowl with the dressing on the side so people can drizzle on as much as they want but feel free to do the drizzling yourself. Or just mix all the salad ingredients with the dressing. This recipe  might make more dressing than you will need but that’s not a bad  thing. It’s perfect on other greens or roasted veggies.

A hearty, warm, vibrant salad to nourish and chase away the impending winter blahs. Oh, I should say this recipe makes a pretty hefty  party sized salad. So you can always halve the quantities to make a smaller amount. But like I said, you can keep it in the fridge for a couple of days with nothing to worry about. And then change it up with some cooked quinoa or millet, or alongside a spicy soup or stew.

Harvest Kale and Roasted Butternut Squash Salad + Creamy Maple-Cider Dressing

vegan, soy-free, gluten-free

Makes a party sized salad

Prep Time 20 minutes

Cook Time 35-40 minutes

Ingredients for the salad:

2 bunches of kale, washed, ribs removed, chopped into bite sized pieces (about 12 cups)

1 butternut squash, peeled and cubed (about 8 cups)

2 Tablespoon extra virgin olive oil, divided

1  Tablespoon apple cider vinegar

1.5 Tablespoons maple syrup

1 teaspoon salt

1/2 teaspoon freshly ground pepper

1/2 teaspoon ground cinnamon

1/4 teaspoon ground cloves

3/4 cup raw pumpkin seeds

3/4 cup dried cranberries, chopped

1 batch of creamy maple-cider dressing

Directions:

  1. Preheat oven to 450ËšF. Line a large rimmed baking sheet with parchment paper.
  2. In a large bowl drizzle the kale with one tablespoon of olive oil and the apple cider vinegar. Gently squeeze and massage the kale until thoroughly coated with the oil and vinegar. Set aside.
  3. Place the squash on the baking sheet, drizzle with one tablespoon of olive oil, all  of the maple syrup, salt, pepper, cinnamon and cloves, and toss to combine. Arrange in a single layer and roast for about 35-40 minutes, flipping once halfway through cooking time. Squash should be cooked through and browned around the edges.
  4. Heat a medium skillet over medium-high heat, add pumpkin seeds and toast until starting to turn golden and fragrant, about 3-5 minutes. Stir frequently so that they don’t  burn. Transfer onto a plate and let cool.
  5. To assemble the salad, place the massaged kale onto a platter or bowl, top with toasted pumpkin seeds, dried cranberries and roasted squash. Drizzle or toss with about 1/2-3/4 of the dressing and serve with extra dressing on the side.

Ingredients for the dressing:

1/2 cup extra virgin olive oil

1/2 cup apple cider vinegar

2 Tablespoons maple syrup

2 Tablespoons tahini

1 clove of garlic, peeled

1 teaspoon salt

1/2 teaspoon freshly ground pepper

1/8 teaspoon ground cloves

6-8 Tablespoons water

Directions:

  1. Combine all ingredients and 6 tablespoons of the water in a blender and  blend on high until emulsified. Add extra water as needed to achieve a pourable consistency.

img_2736

Dark Chocolate Cherry Granola

img_2486img_2569

Awww man, y’all are gonna lose your shhhh for this one! Believe it or not, this is only one of the very few times I have made my own granola. I’ve had every intention in the past, just zero execution. Confession: that could be said about other aspects of my life too, I suppose. Procrastination is the name of my game and I am VERY good at it (let it not be said that I don’t have any skills!) If putting things off until the last minute and figuring out ways to avoid what I need to do by doing everything else instead was a sport, I’d be a world champion. That’s not to say I’m lazy – just good at deferring. And even in the kitchen, I cook all the time but creating workable, tasty recipes that make sense and can be replicated is another thing on its own – that requires planning, forethought, precision, and measuring spoons. All of which just slow me down in the kitchen. But the desire to share good food that is delicious and nourishing in equal measures finally succeeded – and so I have hunkered down, with note pad and pen in one hand and measuring cups in the other (or something like that) and started not just making food, but actually developing recipes. Who am I?? Also, it helps that my recent foray into this was received so generously by my family and friends, one just can’t help but be inspired to go on.

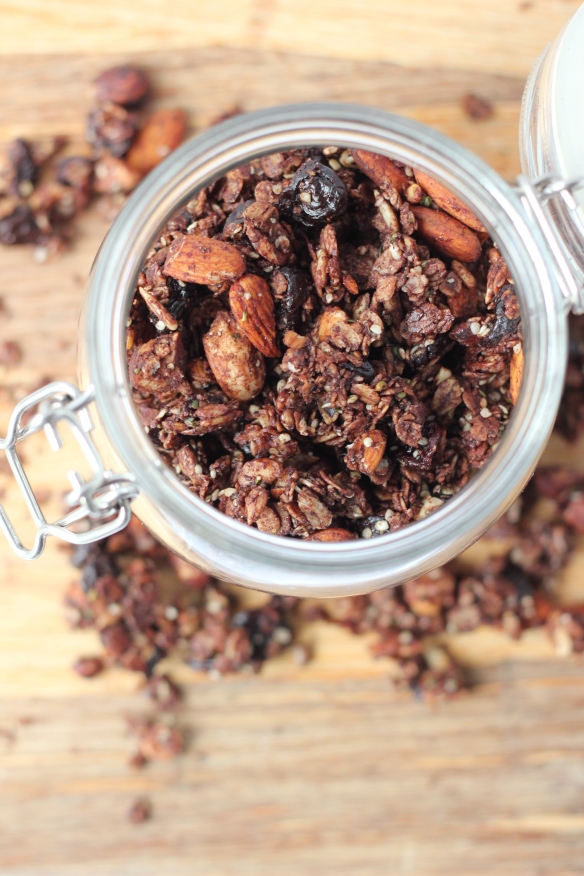
So let’s get on with this recipe. There are some food pairings that just seem to be made for each other: peanut butter and jam, coconut and pineapple, lime and tequila. And of course chocolate plus cherries, the darlings of this recipe. I mean, when have chocolate and cherries together ever been a bad idea? Never. Am I right? Thought it has to be said that the cherries also go beautifully with the hazelnuts in this recipe, and the almonds, and well the chocolate goes with just about anything (chocolate + hazelnuts, enough said.) So what we end up with is a jar full of goodness that just loves to intermingle, and each ingredient, while good on its own, elevates the others. A metaphor for a utopian society dare I say? If granola can inspire a visionary world view, well all the better in my opinion.

I had some family and friends try this granola out on its first outing and the reviews were fantastic. On top of yogurt, paired with almond milk for breakfast, or straight up out of the jar by the fistful, everyone fell in love. The recipe is pretty simple too: you mix the dry ingredients together, and essentially make a raw chocolate to coat everything in. Mmm, a chocolate bath. I know that dried cherries can be quite pricy but a little goes a long way. In any case, feel free to substitute dried cranberries instead if that’s all you have on hand. That goes also for the nuts and seeds, change those up if you want but keep the amounts the same. It’s a pretty flexible recipe – and far better than most of the granola you can buy, both in taste and nutrition. Nourishing dried fruit, seeds, nuts and oats with antioxidant rich cocoa powder and a touch of maple syrup. That’s it.

img_2574


img_2450

Finally I have to say I chuckled a bit when naming this recipe. I though, once people read chocolate and cherries I will have them sold! They won’t even notice the word granola in there. Muahaha, got you!

Oh! One  more thing, as I was eating this bowl of granola I was rewarded with a delicious, rich chocolatey almond milk. Never a bad thing.

img_2570


Dark Chocolate Cherry Granola

vegan, soy-free, gluten-free option

Makes about 6 cups

Prep time 10 minutes 

Cook time 30-35 minutes

 Ingredients

1 1/2 cup large flake rolled oats, gluten-free if needed

1 cup raw almonds, roughly chopped

1/2 cup raw hazelnuts, roughly chopped

1/2 cup raw sunflower seeds

1/4 cup hemp hearts

1/2 cup dried cherries, roughly chopped

scant 1/4 teaspoon salt

1/3 cup coconut oil

1/3 cup maple syrup

1/4 cup cocoa powder

1 teaspoon vanilla

Directions

  1. Preheat oven to 300ËšF (150ËšC) and line a large rimmed baking sheet with parchment paper, set aside.
  2. In a large bowl, combine oats, almonds, hazelnuts, sunflower seeds, hemp hearts and dried cherries and salt. Stir well.
  3. In a small saucepan over medium-low heat, melt coconut oil, remove from heat and whisk in maple syrup, cocoa powder and vanilla.
  4. Pour the chocolate mixture over the dry mixture and stir well until everything is well-coated.
  5. Tip the granola mixture onto the prepared baking sheet and spread out into an even layer. Press down on the mixture with a spatula or wooden spoon so that it sticks together.
  6. Bake for 15 minutes. Remove from oven and stir, again spreading it our into an even layer and pressing it down. Bake for another 15-20 minutes. Let the granola cool completely on the baking sheet, it will harden as it cools. Break the granola up into clusters and transfer into an airtight container (I use glass jars).

Tips

You can chop the nuts by pulsing in a food processor.

Substitute equal amounts of other nuts, seeds, dried fruit as you wish.

img_2577