Tofu and Vegetable Stir Fry + Easy Almond Butter Sauce

IMG_3863

I promise to get to the stir fry in a second, but first a little bit of self-reflection never hurt anyone 😉

Let’s talk friends, i.e. the family that you choose for yourself, the tribe you willingly associate yourself with, the group of people who serendipitously come into your life (and sometimes back into your life), a network of people that grows roots and supports you through thick and thin. I’ve been compelled to reflect on my friendships these past few weeks – for a variety of reasons, some incredibly good and some quite unsettling. Luckily for me the unsettling bits did not originate from within my circle, but nevertheless I have been one of the affected bystanders hit with a storm of betrayal and lies. All I can say is that I am one fortunate woman to have the friends that I have. More than fortunate. Blessed, in fact, if I may use this clichéd and worn-out, hashtagged to death remark. But it hasn’t always been like this.

About five years ago I ended a very long term, depleted relationship; and even though its conclusion was far overdue and inevitable, it still left me reeling and feeling lost. At that time I had a couple of genuine friendships and a handful of tenuous ones. As I recovered and adjusted to the aftermath, I engaged in new hobbies, rediscovered forgotten ones and started making connections  with people from all walks of life. In the midst of this flurry of new faces, I found those that have now solidified into friendships that I deeply treasure. I’m not gonna lie, it wasn’t easy for me at first. Over a decade since high school graduation (where I was a shy and reserved creature) I wasn’t sure HOW to make friends. Sounds ridiculous, right? But I wager that many adults just aren’t sure how to navigate the friend-making landscape. It gets a bit more complicated once you’re past the point of playing in the school yard, where a short recess spent kicking a ball around or playing hopscotch leads into the best-friends-forever realm. In any case, I guess somehow I figured it out. Five years later I am surrounded by people that make me a better person. And that’s the ultimate jackpot right there. The friendships that I have made over the last few years, as well as those that have endured the growing up years, have shown me how to be a more caring, empathetic, authentic, giving, loving, generous person. I am still learning and VERY much a work in progress. But as I reflect on the me pre-big-life-changing-breakup to the current me, it still astonishes me how much I have changed. And entirely (mostly) for the better. And all because of my tribe. I mean these people who willingly spend time with me are selflessly taking care of sick family members, raising smart and kind children, organizing care packages for those in need of a pick-me-up or some extra TLC, volunteering in their communities, reaching out to those who are isolated, and tirelessly setting an example of what a good human being should look like. It is impossible for some of that not to rub off on me. Like glitter off a princess Barbie, that stuff really sticks! And so I am grateful, and thankful, and blessed, and indebted to the universe for my friends. How did  I ever get so lucky.

And now for a clever segue to this stir fry. Well, I guess just like my friendships, this dish is uncomplicated, nourishing, deeply satisfying and rich in flavour. Kind of proud of what I just did there. Okay, please don’t leave. I promise I’m done now.

This recipe is a more formalized version of something that I have  been cooking for years – except that in the past I would just throw a bunch of dashes of this and that straight into the pan and somehow it would turn out. But people want numbers and proportions and so I nailed it down for you!

IMG_3851IMG_3855

It really is a pretty simple and versatile recipe. Sub in whatever veggies you like  – mushrooms, peppers and baby corn would work beautifully. But I am partial to the sponge-like quality of broccoli which tends to hoard the tasty sauce within its abundant tendrils. Whatever veggies you choose, add the ones that cook longer first, a few minutes ahead of the others. You can easily make the almond butter sauce nut-free by subbing in tahini. If you like garlic, add some of that in along with the ginger – I’m  not a garlic-hater, but I choose to do the least amount of chopping per any recipe I make. I am chopping averse. Or maybe I just like quick recipes. 

Please let me know if you make this!! You could even just make the sauce and slather it onto whatever food you please. Like friendships, this sauce makes life better…okay, here’s the recipe finally. Who lets me write anyway?

IMG_3895

Simple Veggie and Tofu Stir Fry + Almond Butter Sauce

Serves 3-4

Prep Time 15-20 minutes

Cook Time  20 minutes

Ingredients for Stir Fry:

1 block of extra firm tofu, cubed

1 Tablespoon coconut oil, or other neutral tasting oil

1-2 Tablespoons minced fresh ginger, to taste

2 Tablespoons water

2 Tablespoons tamari

1 bunch of broccoli or cauliflower, trimmed and cut into bite-sized florets

3 carrots, peeled and sliced into desired shape

2 zucchini, sliced into desired shape

Ingredients for Almond Butter Sauce:

4 Tablespoons roasted almond butter (may be substitutes with natural peanut butter, or tahini for a nut-free version)

4 Tablespoons freshly boiled water

2 Tablespoons tamari sauce

3 Tablespoons natural rice vinegar

1 teaspoon maple or agave syrup

1 teaspoon red pepper flakes (optional)

 Directions:

1. In a large non-stick sauté pan or wok, heat coconut oil over medium-high heat. Add cubed tofu and cook, stirring often, until golden brown on most sides, about 10 minutes. Remove from pan onto a plate.

2. Reduce heat to medium and to the same pan add minced ginger, 2 Tablespoons tamari sauce, 2 Tablespoons water and broccoli or cauliflower. Stir well and cook 3-5 minutes. Add carrots and zucchini and cook 5 more minutes.

3. While vegetables are cooking, in a medium bowl whisk almond butter and freshly boiled water with a fork until smooth, add the rest of the ingredients and whisk until combined. Adjust to taste.

4. Add almond butter sauce to the vegetables and stir to combine. Add tofu back to the pan, stir and cook 1-2 more minutes until flavours meld together. Enjoy!

IMG_3897

Indian Spiced Chickpea Skillet Cake

img_3714-4

Here in Southern Ontario, the Greater Toronto Area to be exact, we experienced what is akin to a heat wave in winter this past weekend. Temperatures in the (low) double digits (Celsius that is) warmed our bodies and our souls and an abundance of sunshine made everything seemed brighter. Sigh, we collectively needed this! Or at least I needed this. Days like this weekend remind me that everything is going to be okay. Life will be okay. More than okay! Spring is around the corner, we just have to hang in there for a few more weeks.

You know what else warms the body and soul? Spicy, flavourful, easy dishes made with nourishing ingredients. You might have noticed that I love spice. A lot of spice. Like, all the spice in the world. And by spice I mean spices AND heat. In my world, the hotter the better. It’s like an addiction and I often crave spicy foods. My sister gets me. She’s just the same.

img_3718-3

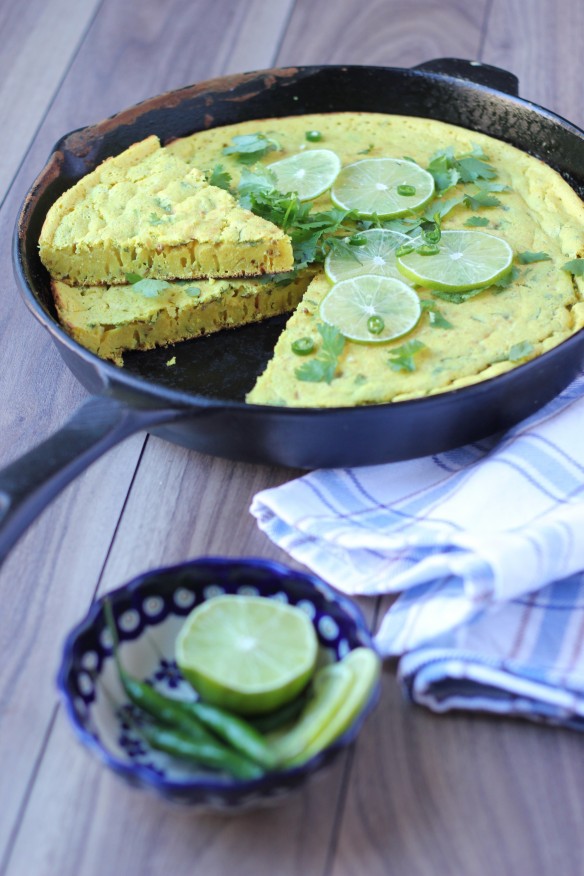
In this spiced chickpea skillet cake the spice comes from some wonderfully robust Indian inspired spices like cumin seeds and fresh ginger, as well as from green chilies which you can dial up or down based on your preferences. You can guess which direction I went! This skillet cake is modelled after an Indian dish called dhokla, if only in flavours and ingredients, not actual execution. Traditional dhokla requires a pressure cooker to make and yields a spongy, super light savoury cake. Like a cloud in your mouth! I rely on baking powder to help achieve a bit of this airiness, though my recipe creates something much more dense and filling. In any case, it’s taste is reminiscent of dhokla and that is all I can wish for. To make it a bit more traditional you could drizzle the finished skillet cake in black mustard seeds and chopped green chilies fried in oil. Alas, no mustard seeds in my cupboard and the stores were closed due to a holiday. I decided to go for it anyway!  

img_3706-2

I love using chickpea flour as it is super cheap (I buy it at a bulk store) and packed with fibre, protein and a host of micronutrients. One 1/2 cup serving of chickpea flour (also known as garbanzo flour or besan) provides you with 10 grams of protein and 5 grams of fibre, as well as about half of your daily folate and a quarter of your daily iron requirements. Please ask me where I get my protein from the next time you see me. It’s also naturally gluten-free (though if you have Celiac disease please buy it in sealed packages!)

Please excuse the seemingly long instructions but I get chatty. And also I needed to explain how I MacGyvered my skillet to have a snug lid to fit over top of it. Yup, using skills in the kitchen!

img_3720-4img_3738-3

Indian Spiced Chickpea Skillet Cake

Serves 4-6

Prep Time 15 minutes

Cook Time 10-13 minutes

Ingredients:

2 cups chickpea flour

1 Tablespoon baking powder

1/2  teaspoon ground turmeric

3/4 teaspoon sea salt

Freshly ground black pepper

2 cups water

2 Tablespoons fresh lime juice (from 1 small lime)

1/4 cup roughly chopped fresh cilantro, packed

1 Tablespoon neutral-tasting oil (avocado, canola, grapeseed, refined coconut)

1 Tablespoon cumin seeds

1 teaspoon coriander seeds (optional)

1 Tablespoon finely minced fresh ginger

1-2 chopped green chilies, leave seeds in

Garnish: chopped fresh cilantro, sliced green chilies, lime

Directions:

1. In a medium mixing bowl, whisk chickpea flour, baking powder, salt and pepper to combine. Add water and lime juice and whisk well, ensuring batter is smooth and lump free. Set aside.

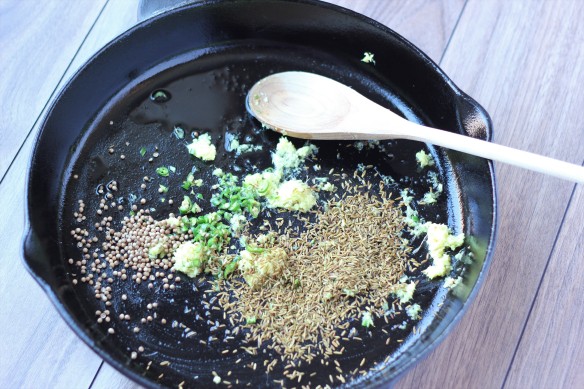
2. Choose an oven-proof, non-stick frying pan or well seasoned cast iron skillet, for which you have a tight fitting lid (I used a lid from a large stock pot and used a couple of pieces of tin foil to plug the gaps along the rim of the skillet). Heat oil over medium-high, then add cumin seeds, coriander seeds, ginger and chilies. Fry, stirring often, until fragrant and seeds begin to pop,  about 1-2 minutes.

3. Add fried spices, ginger and chilies to chickpea batter and whisk in. Don’t worry if you don’t get every seed and bit from skillet. Place skillet back on the stove and turn heat down to low. Carefully pour chickpea batter into the skillet and cover with the lid (no peeking – the key is to allow steam to build up and help in cooking the cake.) Cook over low heat for 6-8 minutes, until bubbles appear on surface and mixture starts to set (you will notice the top of the cake will start to dry out and become less jiggly.) Be careful not to burn the skillet cake! Low heat is key here. While cake is cooking on the stove top, set oven on to broil.

4. Once batter is mostly set, remove from heat, remove lid and place skillet on middle rack and broil for 2-3 minutes. Watch carefully to ensure skillet cake does not burn! This is not the time to walk away and start a new task. Carefully remove skillet from the oven (it’s hot!) and allow to cool. Once cool enough to handle, you can flip the  skillet cake out of the pan onto a serving plate, or serve straight  form the skillet. Top with desired garnishes. It tastes best when warm, so eat right away! Or store leftovers in the fridge and reheat before eating.

img_3763-2img_3760-2

And now for a PSA: Let me know if you make this recipe! Share with your friends! Like and comment below!

xo

Enjoy life and good food and sunshine,

ilona

Double Dark Chocolate Truffles (Vegan)


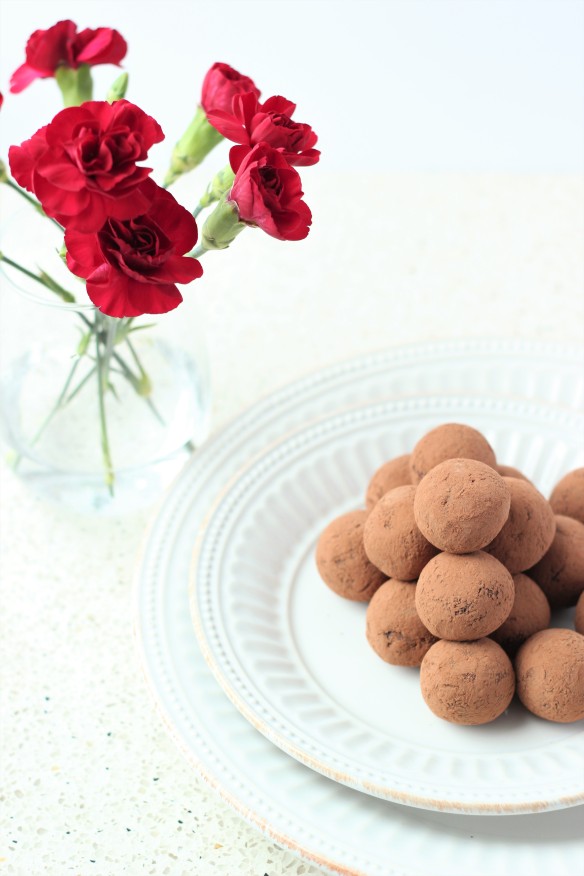
img_3584-3Keeping it short and sweet today. Just like this recipe. A sweet, simple treat for Valentine’s Day. Or any day. Maybe every day? These decadent truffles taste like they came from a fancy chocolate shop but in fact require only four main ingredients and a bit of chilling time to make. Insanely rich, smooth and satisfyingly chocolaty, they will surely impress your sweetheart or whoever the lucky recipient may be.

img_3563-2img_3581-2

I can’t say I always liked celebrating V Day. Totally jaded and turned off by the artificially manufactured saccharin sweetness of the whole thing made me indifferent at best. But I suppose over the years I have realized that celebrating anything in life is a good foil for the negativity and wretchedness of what goes on around us. The world needs more love. So why not honour it, even if it is with tacky cards and overpriced flowers. Better yet, with truffles. Double dark chocolate truffles. Vegan and easy at that. Make them and share them or hoard them for yourself. Love yourself. Love those around you. Love your family. Love life. And hey, love carnations too! They are in fact beautiful but for some reason have  been relegated to the bottom of the barrel for far too long. I love you carnations. You complete me.

img_3598-2img_3646-2img_3635-2

Don’t be scared of the long instructions, I’ve just included tips that that I have found helpful along the way. And here are some pictures to help you out as well…

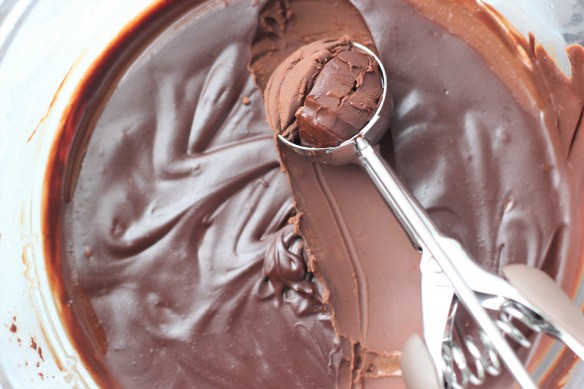
Chilled bowl of ganache:

img_3526-2

Scooped ganache chillin’:

img_3528-2

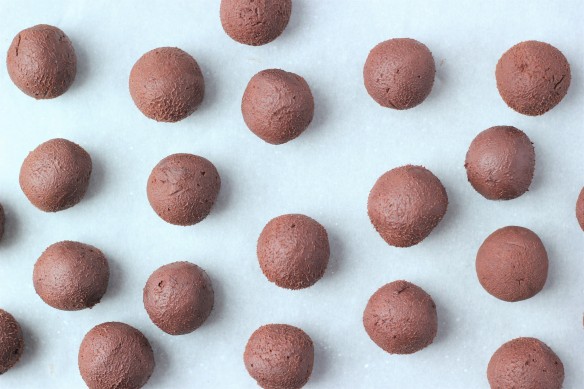
Rolled and ready for some cocoa lovin’:

img_3536-3

Sprinkled with cocoa:

img_3553-2img_3547-2

Rock and roll  time:

img_3562-2

Double Dark Chocolate Truffles

Makes 16-18 truffles

Prep Time 30 minutes (total)

Chill Time 2 hours

Ingredients:

200g dairy-free dark chocolate chips (1 cup + 2 Tablespoons chocolate chips)*

125ml light coconut milk

1 Tablespoon (15ml) virgin coconut oil

pinch of sea salt

2 Tablespoons (30ml) cocoa powder

Directions:

1. Place chocolate chips in medium-sized bowl; find a plate that will fit over bowl to cover.

2. In a small saucepan combine coconut milk and coconut oil and  heat over medium heat until just starting to bubble. Pour the hot liquid over the chocolate chips (don’t mix yet!) and cover with the plate. After about 2 minutes, remove plate add the pinch of sea salt and stir chocolate mixture. The chocolate chips should have melted in the hot liquid, but if there is still some unmelted chocolate, microwave in 15 second intervals until fully melted. You have now  made ganache! Cover bowl with the plate again and refrigerate for about 2 hours, until mixture has firmed up.

3. Once mixture is cooled and firm, but still moldable, remove from fridge. Using a small ice cream scoop (a great tool for this part, mine holds just a little bit more than 1 Tablespoon), scoop out ganache, level off and turn out onto the plate that was covering the bowl. Repeat until you’ve used up all the ganache. The chilled plate helps to prevent the truffles from melting or becoming too soft. If you don’t have a small ice cream scoop, use a Tablespoon measuring spoon for this.

4. Now roll each ganache mound with your hands into an evenly shaped, smooth ball and place on a small rimmed cookie sheet or a shallow glass dish; line the cookie sheet or dish with parchment paper if you like. It helps to cool your hands under running cold water, then drying them thoroughly before rolling – this prevents the ganache from sticking to your hands. You may have to wash your hands once or twice during the rolling process if they become sticky.

5. Once all the truffles are rolled, scoop the cocoa powder into a small fine-meshed sieve and sift over the truffles. Next, roll the truffles around by shaking the cookie sheet or dish gently until the truffles are entirely coated. I’ve found this to be the most efficient way to coat the truffles in the cocoa powder.

6. Transfer the truffles into an airtight container and keep at room temperature for a few days or in the fridge for up to a week (if they last that long). Enjoy!

* I used Enjoy Life Dark Chocolate Morsels; you can also use 200g of your favourite bar chocolate finely chopped. Choose good-quality chocolate as it’s the star ingredient!

img_3574-2

If  you do end up making these, share your creations on social media and tag with #soundbitesnutrition.

Have a lovely Valentine’s Day and eat lots of chocolate!

xo

ilona

img_3614-2img_3685-2

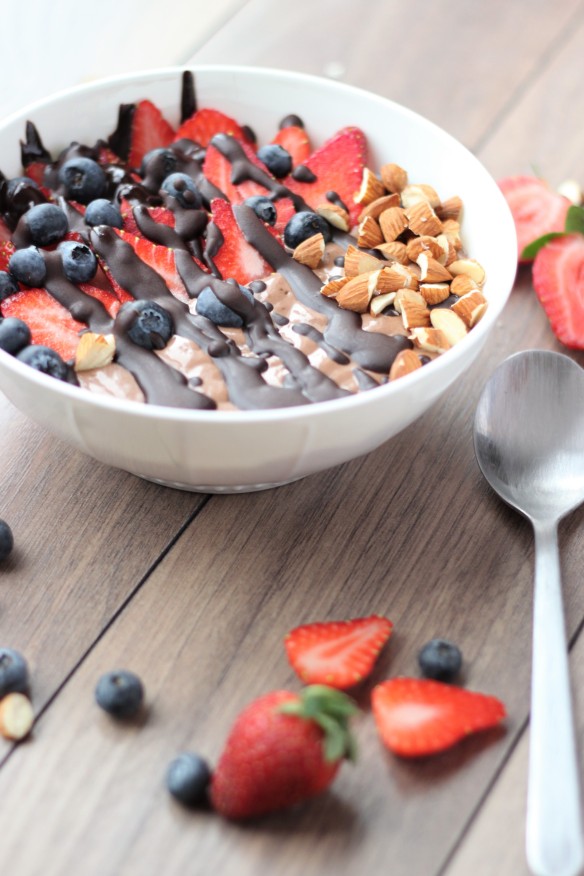
Almond Butter Cup Smoothie Bowl + Magic Chocolate Sauce

img_3426

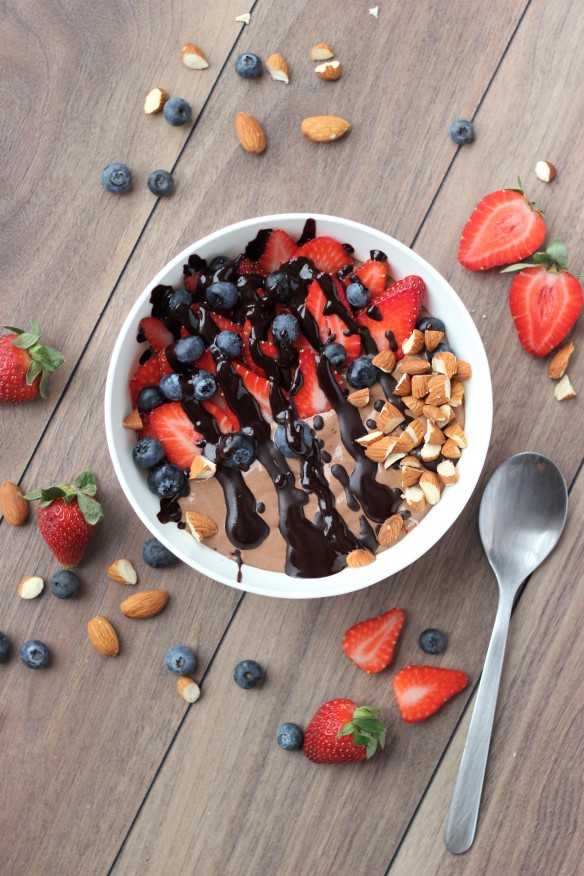
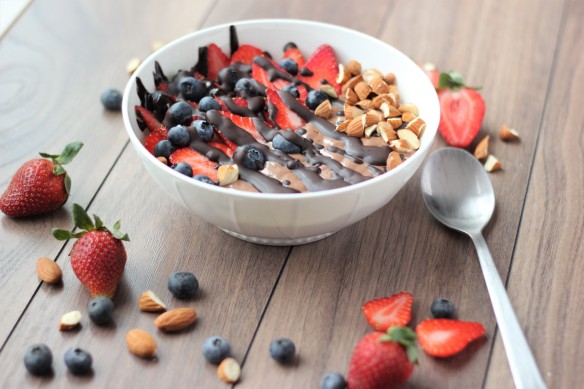
Permission to eat chocolate covered strawberries for breakfast granted! You’re welcome. Very, very welcome. Because in the depths of this Southern Ontario sun deprived deep freeze kind of a winter some joy is needed. And chocolate brings joy. Especially in the form of a chocolatey smoothie bowl made up of high vibe ingredients to delight the body and soul. Though I have to say, while chocolate does its magic, for anyone reading this who hails from some warm and sunshiney corner of the world – can I come live with you?? I think I make a decent roommate. I can guarantee good food, witty banter and a willingness to clean. Ok, so only one of those is true.

In the meantime, back to chocolate. For now. Until someone from California sends for me.

img_3451img_3456

So this smoothie bowl is the first smoothie bowl I have ever made. For real. I feel like I’m so late to the party that the party is almost over…they’ve started playing this. I know smoothie bowls have been around for forever but for some reason I’ve never been compelled to make one. Probably for a few  reasons: A) A smoothie bowls seem like breakfast food to me B) I’d much rather eat something savoury for breakfast and C) I pretty much always eat breakfast in my car on the way to work. Smoothie bowls are not conducive to these pursuits. But one day this past week I woke up with this exact smoothie bowl idea in my head. I imagine that’s what song writers or artists or novelists mean when they say that ideas come to them fully formed. Except in my case it’s always food. Sometimes a half-baked concept that collapses when put into action (ahem, shortbread cookies) and sometimes a successful recipe that strikes gold upon first try. This bowl was of the latter sort. A vision appeared in my head, I created it and then praise was heaped upon it by those who tasted the magnificent results. Or something like that.

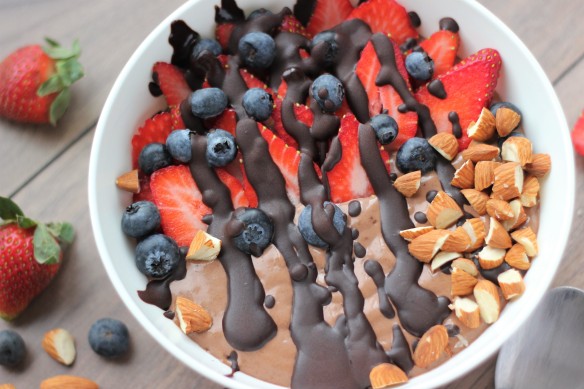
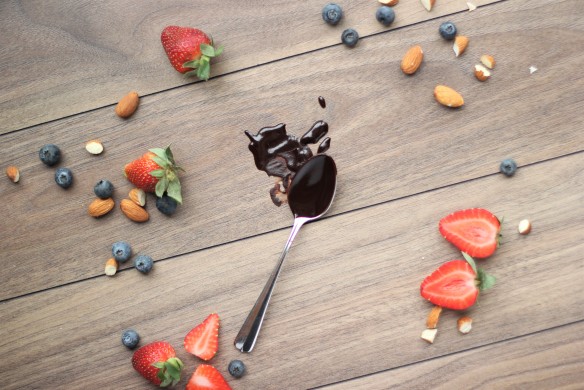
This recipe makes a pretty good sized smoothie bowl so it’s perfect for sharing. Though with about 24 grams of fibre (!!) and 13 grams of protein, it makes a mighty satisfying meal for one. There’s virtually no added sugar in this recipe, except for the maple syrup in the chocolate sauce, which you can skip. Though the chocolate sauce is my favourite thing about this bowl! It is super easy to make and it hardens when poured onto the icy smoothie and cold fruit, creating a shell of chocolate drizzle that breaks up into chocolate chunks as you crack it with your spoon (that’s the magic!) Umm are we talking decadent dessert or breakfast still? To be quite honest I don’t think anyone would complain if you finished off a meal with this and called it dessert. I certainly wouldn’t. Perhaps a Valentine’s Day treat?

The other ingredients are essentially fruits, seeds and nuts. These do a body good! And all the chocolate goodness comes from good quality organic cocoa powder as opposed to processed chocolate. I can live with that.

img_3447img_3489

Almond Butter Cup Smoothie Bowl With Magic Chocolate Sauce

Makes 1-2 Servings

Prep Time 10 minutes

Ingredients for the Smoothie Bowl:

2 frozen bananas, broken up into chunks

1-2 medjool dates

3/4 cup unsweetened almond milk (or other plant-based milk)

2 Tablespoons cocoa powder

1 1/2 Tablespoons chia seeds

1 1/2 Tablespoons smooth almond butter

 Ingredients for the Chocolate Sauce:

2 teaspoons virgin coconut oil, melted

2 teaspoons maple syrup

2 teaspoons cocoa powder

Toppings:  strawberries, blueberries, raspberries, sliced banana, chopped raw almonds; other fruit or nuts may be used, as desired

1. Blend all smoothie bowl ingredients in a blender until smooth. Depending on your blender, you may need to stop it a few times and use a spoon to move the ingredients around, or use more almond milk to get it to  a smooth consistency. If you have a Vitamix, use the tamper to move the ingredients around.

2. Use a fork to whisk all chocolate sauce ingredients until smooth.

3. Pour smoothie into a bowl, top with desired toppings and drizzle with the chocolate sauce. Enjoy!

img_3505

img_3514

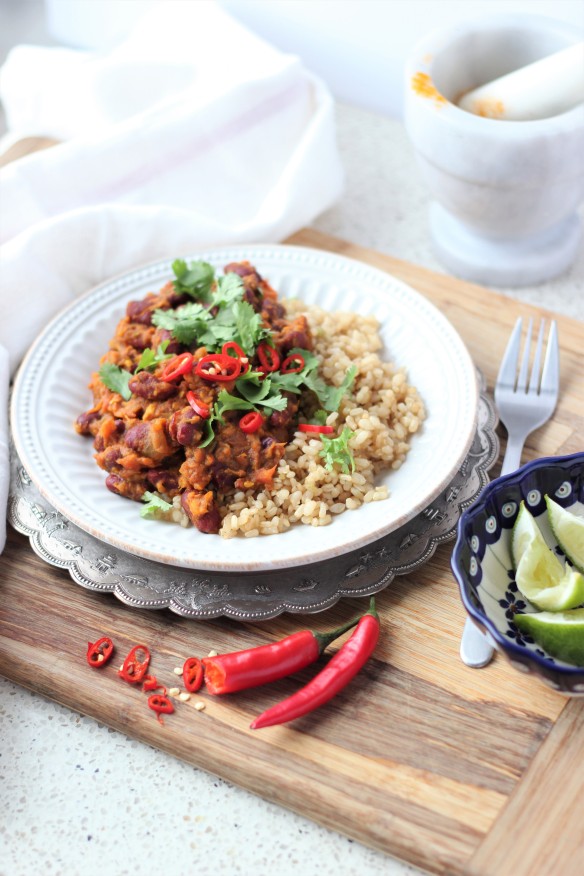
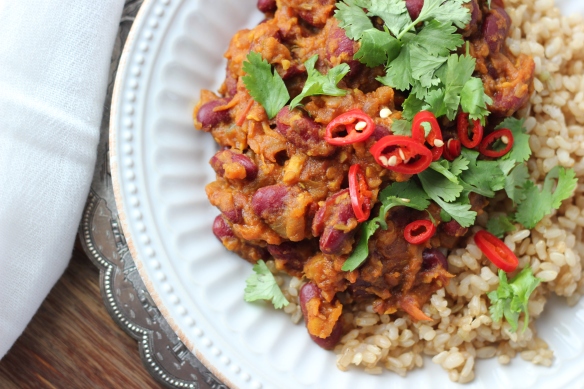
Red Kidney Bean Curry (Rajma)

img_3414

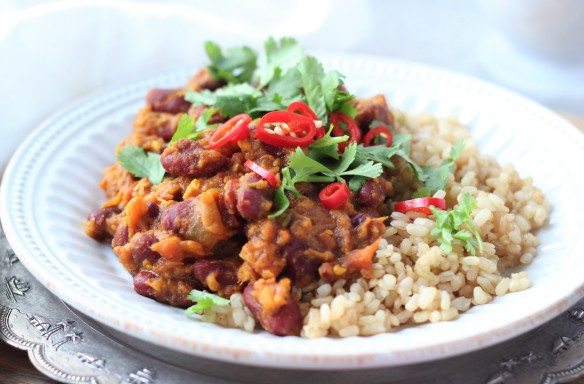
Sometimes life hands you lemons. Kernels of sourness. Little moments or truths or revelations that just make you pucker up and shake your head in disbelief. Like really universe? This is what you’re going to throw my way? You want to laugh and cry at the same time, on one hand feeling frustrated with the parade of disappointments, but on the other cherishing these moments for the inevitable memoir that will surely entertain the masses. In any case, I’ve learned that it’s best to take the Buddhist path in these instances – let go, live in the here and now and don’t sweat the future. Call up a good friend, shed a few tears, eat a cupcake, then laugh at the audacity of life. Good food helps. Especially a dish that warms from within to chase away the winter chill and nourishes your body with plant-based goodness that pairs plenty of exotic (but easy to find) spices with otherwise simple ingredients. This red kidney bean curry is known as rajma and hails from Northern India. Now let me qualify that a Polish-born Canadian girl making a very traditional Indian curry might take some  liberties with the recipe so this may or may not actually resemble what a real rajma looks or tastes like, but nevertheless I love (LOVE) the results. In fact, now that I think of it, I’m not sure if I’ve ever actually eaten authentic rajma. I’ve heard lots about it from friends and the families of South Asian decent that I counsel in my role as a dietitian (apparently rajma is a beloved dish for many children.) I’ve read and researched plenty of recipes when I decided to make my own many years ago – I can only guess at how close mine is to the real thing. In any case, as I said, the recipe that follows creates a beautiful, spiced dish that satisfies.

img_3375img_3362img_3357

Red kidney beans are part of the pulse family (which includes beans, peas and lentils) and Canada is the world’s second largest grower of this nutrient-packed bunch (right after India). Alberta, Saskatchewan, Manitoba, Ontario and Quebec grow hundreds of varieties and exports are a billion dollar industry! Talk about home-grown gold. Pulse Canada does an amazing job curating recipes, factsheets and lots  of great information about pulses – please check out their website. While 2016 was the Year of Pulses,  they are not going anywhere. In fact, pulses are gaining popularity and a larger share of the real estate on our plates. And this is no surprise really, they are incredibly cheap, versatile, brimming with protein and nutrients and hailed as a sustainable crop. The future is pulses! Did I mention the nutrients??

img_3269img_3312img_3299img_3328

I used canned kidney beans for this recipe but give dried beans a chance too. They just require soaking overnight, then a quick rinse and boiling the next day. Mostly idle work. I make big batches at a time then store in zip top bags in the freezer. Check out cooking guidelines for various pulses here. I should  also say give (dried) peas a chance as well. Hehe.  

img_3352

Red Kidney Bean Curry (Rajma)

Serves 4

Prep Time 15 minutes

Cook Time 30-35 minutes

Ingredients:

3 Tablespoons avocado oil, or other neutral tasting oil (grapeseed, canola)

1 medium/large sweet onion, roughly chopped

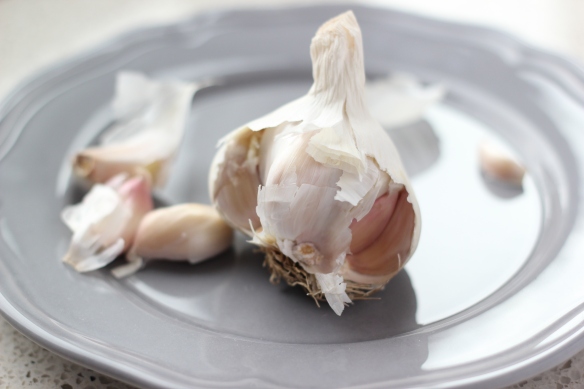
4-5 cloves of garlic

2 inch chunk of ginger, peeled

1 Tablespoon cumin seeds

1 teaspoon red pepper flakes or 1 Tablespoon finely chopped fresh red chile, or to taste

1 teaspoon garam masala

1/2 teaspoon ground turmeric

1/2 teaspoon ground coriander

1 teaspoon salt, or to taste

1/4 teaspoon freshly ground black pepper, or to taste

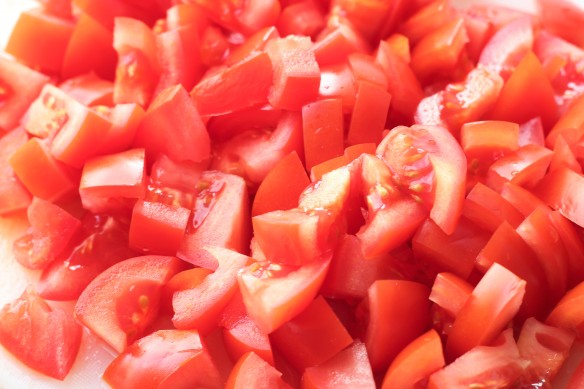
4 medium tomatoes, chopped

2 (19oz/540ml) cans of red kidney beans, drained and rinsed

1 1/2 cups water

Cooked grain of your choice (rice, quinoa, sorghum, millet) or flatbread, for serving

Chopped fresh cilantro, lime wedges and chopped red chile to garnish (optional)

Directions:

1. Add ginger and garlic cloves to bowl of food processor and process until finely chopped (about 30 seconds). Add onion to the minced ginger and garlic and pulse until chopped. Alternatively, if you don’t have a food processor, mince ginger and garlic, and finely chop onion with a knife.

2. Heat oil in a large saucepan on medium heat, add ginger, garlic and onion and cook until soft and translucent, about 3-5 minutes.

3. Add in cumin seeds, red pepper flakes or red chile, garam masala, turmeric, coriander, salt and pepper, stir to combine and  cook until fragrant, about 1-2 minutes.

4. Add in chopped tomatoes, including any juices, stir to combine, and simmer uncovered for about 15 minutes, stirring often, until liquid has mostly evaporated and the oil starts to release from the mixture. Reduce heat to medium-low if mixture starts to bubble too fast and sticks to the pan.

5. Add in kidney beans and water, stir to  combine, cover with lid slightly askew (to allow steam to escape) and cook for about 8-10 minutes until curry thickens, stir from time to time to make sure curry does not stick to the bottom of the pot. Take off the heat. If desired, using a potato masher, mash some of the kidney beans in one corner of the pot; this will thicken the sauce a little bit while keeping most of the kidney beans whole.

6. Serve with cooked grains or flatbread and garnish with toppings as desired.

Tips:

You can add more water to the curry after the last step if you prefer a thinner consistency.

You can buy all the spices at a bulk store if you prefer to buy smaller amounts.

img_3364

img_3423

Restorative Sesame Golden Milk

img_3167

Anyone else feeling the cold-weather slump? Silly question, really. I think it’s inevitable living in the ever changing climate of Southern Ontario. Unless you live in a part of the world where each season is marked by date alone, there is a unique collection of weather events, shifting temperatures and a transformation of the flora and fauna that marks the passing of time. Along with this there is a shifting of mood and feelings, an ebb and flow of emotions and thoughts. The summer months echo a lightness and carefree attitude, whereas as the daylight grows scarce and the thermometer gauge plummets, there is an inherent introspectiveness and sharpening of emotions as winter settles in for the long haul.

And by this point in the year it definitely feels like the long haul. With the holiday season now a distant memory, the bright twinkle light displays being turned off one by one, we hunker down to endure the rest of winter. I know that sounds like I hate winter. I don’t really, I appreciate living in a part of the world that has seasons with each possessing its own beauty and charm. But winter just seems to last sooooo long! At some point I’m just over it, and judging by conversations with others, that moment where we just want to shake off the chill and ease into the promise of warmth and brightness that spring heralds starts to germinate in January, grows in February and explodes in March. We are all just weary by March. And then somehow spring arrives, at first with a whisper and then unfurling with ever growing momentum. And before we know it we are basking in the breeze of the first warm-weather day in our short sleeves, soaking up the sweetness of a sun-drenched day, breathing in deeply as the first blooms release their heady aromas and the melody of chirping birds matches the soaring elation we feel deep in our souls. Ahhhh, we shall be there soon my friends. For now we make do with the mesmerizing sun glinting off snow blanketed fields and ice covered tree branches, cozy sweaters and thick cable-knit socks, hearty meals and soothing tonics.

img_3184

img_3176img_3190

 Enter this brightly-hued, restorative drink. It is a creation borne of my seemingly unending obsession with turmeric – a vibrant, orange-yellow spice known as much for its earthy flavour as for its health benefits, and my love of sesame. Turmeric contains a well-studied, powerful anti-inflammatory and anti-oxidant compound called curcumin – the claims of its health benefits backed up by good science. Now I don’t want anyone thinking that we are all in a constant state of inflammation – that’s just not the case. But if you suffer from arthritis, joint aches, allergies, general pain, well then curcumin can only help! And it has well established anti-cancer properties too, beneficial for both prevention and treatment (though always consult with your doctor about that.) Curcumin is activated by piperin, a compound in black pepper, otherwise curcumin is not well absorbed by our bodies, hence the addition of a grind of black pepper in this drink (you only need a tiny bit and it doesn’t affect the taste). And now you know! Science is amazing. If you’re not sure if you like turmeric in your drinks, start off with a small amount then build from there. Turmeric is also a great addition to curries, soups, roasted veggies and ginger tea; I often cook my grains with a few dashes too, waking up pale rice, quinoa and millet with a golden glow. Warming cinnamon and protein and omega 3 rich hemp hearts round out this soothing drink to nourish from within. You can drink it cold or slightly warmed.

img_3204

Sesame Golden Milk

Makes 1-2 servings

Prep Time 5 minutes

 Ingredients:

2 cups (500ml) unsweetened almond milk (or other non-dairy beverage)

2 medjool dates*

2 Tablespoons (30ml) hemp hearts

2 Tablespoons (30ml) raw sesame seeds**

1/2-1 1/2 teaspoons (2.5-7.5ml) ground turmeric

1/2 teaspoon (2.5ml) ground cinnamon

1 teaspoon (5ml) virgin coconut oil

a small pinch freshly ground  black pepper

 Directions:

1. Place all ingredients in a high-powered blender and blend until completely smooth. Store in an airtight container or jar for up to 2 days.

*soften in boiling water for a few minutes if firm

**soak overnight if you’re blender is not powerful enough to break them down completely

img_3229img_3245

 PS Listening to this tune while writing about my longing for warmth and sunshine surely helps. I’m in love with this guys music. All of it. Didgeridoos, harmonicas, guitars, drums and bird sounds.

Smokey Chickpea Potato Soup

img_3127I’m on a mission. A mission to get people  to spend more time in their kitchens. Please don’t run away screaming just yet! Hear me out. We demand a lot from our bodies – vitality, energy, a healthy weight. We likely invest time and money in insuring our bodies against illness and ageing – gym  memberships, anti-aging products, yoga, meditation. Yet we are afraid of spending time in the kitchen. Think about it – we are constantly hearing messages about time-saving recipes, convenience foods, short cuts, prepared meals and so on. So much so that we have become averse to our appliances and all that equipment languishing in our cupboards. We drag our feet and protest against cooking, citing long lists of priorities. But preparing food is at the basic level of self-care. We should, in fact, be running towards our kitchens  instead of away from them. Cooking more is one of the ways, perhaps  the most important way, we will be able to resolve so many of our food and health issues. When we prioritize cooking for ourselves and our families, we declare that taking care of our bodies through whole, nourishing meals consumed at our dining tables in the company of our loved ones matters.

Now I get that spending more time in the kitchen doesn’t mean spending ALL of our time in the kitchen. We still want easy to prepare recipes that aren’t going to send  us on a wild goose chase trying to track down unusual spices. There is a time and place for that, and I do admit that I enjoy spending my time unearthing exotic foods and perusing aisles of newly discovered markets. But recognizing that’s not everyone’s cup of tea and with the mission to get people to cook more in mind, I decided to create a recipe that is made with simple ingredients and requires only fundamental cooking skills. In fact I challenged myself to create a recipe with items I already had on hand!

img_3069img_3076img_3086

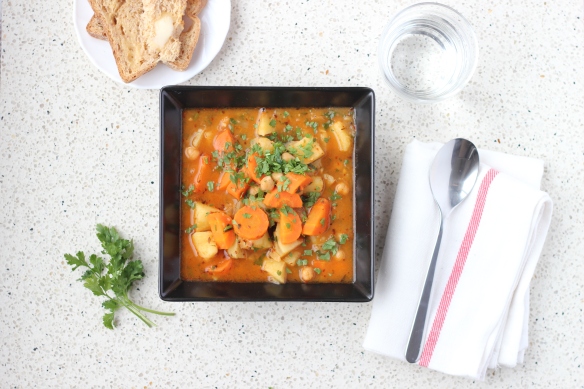
Soups are really at the very centre of convenience cooking. One pot, a bunch of familiar ingredients and a few spices to add flavour and flair, and a bit of idle time. That’s it. This soup contains potatoes, an often vilified vegetable (probably for its incarnations as chips  and fries) but actually delivers a bunch of nutrients in a pretty convenient package. One medium potato with the skin on provides a third of your B6 and a quarter of your potassium and vitamin C needs as well as 15%of your daily fibre requirement. Carrots add colour and beta carotene and chickpeas stand in as the filling, fibre-rich protein source. Despite usually being relegated to decoration, I added parsley as much for its flavour as for its surprising nutritional punch: a quarter cup of chopped parsley provides a quarter of your vitamin C and almost 300% (yes you read that right) of your vitamin K needs. Vitamin K is a powerful fat-soluble vitamin that is involved in the  blood clotting process, so you know, you don’t bleed to death!! Thank you vitamin K *gives high  five*.

As always, this recipe is plant-based but can be enjoyed by everyone. As with many soups and stews, this one tastes even better the next day – so perfect for leftovers! What is your favourite quick and easy to prepare meal that you often cook for yourself and your families?

img_3100


Smokey Potato Chickpea Soup

Makes 6 servings

Prep Time 15 minutes

Cook Time 20 minutes

Ingredients:

2 Tablespoons avocado or extra virgin olive oil

1 medium onion, diced (about 1 cup)

3 cloves garlic, minced

1 Tablespoon smoked paprika, hot or mild

1 teaspoon sweet paprika

1 teaspoon ground cumin

2 teaspoons Italian seasoning*

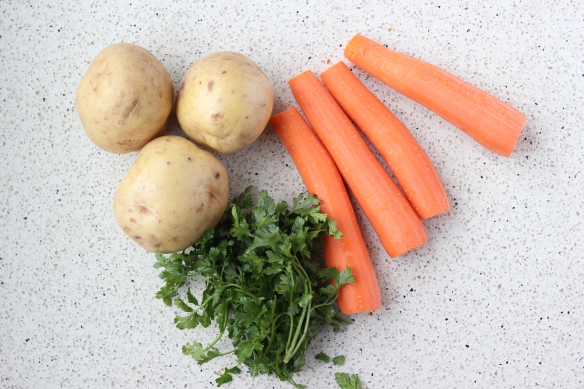
3 medium potatoes, skin left on, cut into 1/2-inch cubes (about 5 cups)

3 carrots, peeled, sliced into rounds or half moons (about 3 cups)**

6-7 cups water

1 (19oz/540ml) can chickpeas, drained and rinsed

1/2-3/4 cup finely chopped parsley

1-2 teaspoons sea salt, to taste

1/2-3/4 teaspoon freshly ground black pepper, to taste

Directions:

1.       In a large pot, heat oil over medium heat. Add onion and garlic and sauté until soft and translucent, about 3-5 minutes.

2.       Add the smoked paprika, sweet paprika, cumin, Italian seasoning and half of  the salt and pepper to the pot and stir for about a minute until fragrant.

3.       Add the potato, carrot and water, stir to combine. Increase heat  to high, bring soup to a boil, then reduce heat to medium-low and simmer uncovered for about 15 minutes, stirring occasionally, until potatoes and carrots are just fork-tender (be careful not to overcook!)

4.       Finally stir in the chickpeas and parsley, and adjust salt, pepper and seasonings to your taste.

 *If you  don’t have Italian seasoning on hand, just use any combination of thyme, oregano, basil, dried sage and rosemary.

**This soup will thicken as it stands (especially overnight), add extra water to thin it or just enjoy as is. I used 6 cups of water.

 Tips:

-I  add the onion and garlic to the pot off the heat as I chop them. Once I have all the other ingredients prepared, I add the oil and turn on the heat.

-I chop the parsley and rinse the chickpeas while the soup is simmering, to cut down on prep time.

-If this recipe leaves you with a bunch of leftover parsley, use it in salads, pasta and rice dishes, smoothies and sprinkle extra on the soup before serving.

img_3139

Shortbread Failures and Life Blow Ups

I was really hoping to post a recipe today. It was all planned out. But it just wasn’t meant to be. After a couple of weeks of testing shortbread cookie recipes I declare defeat. For now at least. Though I solemnly swear that I cannot. Eat. Another. Shortbread. Cookie. Ever. Sad thing really, as they were my favourite at some point, though it’s hard to recall that blissful time in this sugar-induced haze I find myself in. What went wrong? Well, good question, it comes down to science really. The formula of sugar, butter and flour just wasn’t right. Nor were the changes I tried to make. I tinkered with proportions, times, temperatures and materials. Each time believing this batch would be it. But it wasn’t. The last batch being the worst of all. So I have decided to give myself a short shortbread break. A shortbreak. Hehe. Is it a forever break? Heck no! I just need to step away from these cookies long enough to not hate them. Should take a week or so. I’ve also run out of vegan butter.

What you might have seen on my Instagram Stories:

img_20161203_120621274

This whole experience made me think of something I heard on Elizabeth Gilbert’s Facebook page the other day. That’s Elizabeth Gilbert of Eat Pray Love book/movie fame. I recently got reunited with her discourse and community after discussing a book of hers with a good friend. In any case, she said something to the effect that anytime something blows up in your life, more often than not there is something far better on the other side. Now I know cookies don’t have the gravity of life events, but anytime I can use food as a metaphor…and the hope of better cookies on the other side? I’ll  take it! And it’s true, for my life anyway, life has blown up a few times in the past (breakups, injuries, health setbacks, a gazillion moves…) and it has ALWAYS led to a bigger, better, more fulfilling life on the other side. Yes, of course there is that temporary state just after the blow up that makes it hard to see things clearly. You are suspended in this insubstantial space that feels uncomfortable, scary, raw, blurry, you feel vulnerable or drained or fragile. But for me anyway, there were always cracks that allowed some light in. Sometimes those cracks were nothing more than hairline fractures, barely visible to the clouded eye. After going through a few life blow ups, I try to focus on expanding those cracks and coaxing, urging the light to edge out the pain or uncertainty. With practice (I’ve had some), the light seems to know its way back in much faster, I guess it has directions 😉

And blow ups is where the learning happens. You learn about you, your friends and family, your strength, your needs. And with these cookies I’ve learned about the infuriating yet fascinating baking process. One small change to the method or ingredients and boom, a wildly different outcome. I can already see how making endless batches of failed cookies has provided me with knowledge that will inevitably become invaluable as I create new recipes in the future. And yeah there will be more! I don’t succumb to defeat that quickly! Though a shortage of ingredients certainly puts a halt on development.

As an aside, you may have noticed with the last few posts that this isn’t strictly a traditional food blog (but I don’t think there are rules about that anyway). I’m still trying to find my voice and direction with this project and I have decided not to put any limits or agendas in place just yet. My sole intention is to create then post something at regular intervals. Sometimes that may include recipes but sometimes, like today, just words suffice. I do use food metaphors often though, so I guess there’s always that. Cooking and baking for me are like meditation in motion so that’s often when I do a lot of thinking and sorting of the chaos in my brain. Naturally then, for me, creating in the kitchen is tangled up with soul searching.

I am always happy to get feedback, so leave a comment, share with friends if you so please and as always, I am eternally grateful that you stopped by! Even though there’s no nice food pictures this time around 🙂

xo

ilona

There is a crack in  everything. That’s how the light gets in. —Leonard Cohen

Eggnog Nicecream + Gingerbread Chocolate Sauce

img_2965

Some days I sit down to write a blog and know exactly what I want to say. Some days, like today, I have  no idea. My mind is blank. Or maybe not blank, but all the ideas I hold within are blunt and vague instead of sharp and focused. And so I am not writing with the fervour of wanting to spill words onto the page at break neck speed lest they disintegrate. This kind of a writer’s block scenario requires a bit more introspection. What do I really want to say? And so I settle on the truth.

Life has tossed a few obstacles on my path recently, both health and relationship wise. I have taken to yelling at the universe to stop being such an a**hole from time to time while trying to scramble over said obstacles  more or less intact. It is not a graceful process. There’s tears and pain and scars. But I am more than fortunate. I have an abundance of comforts and great friends and family to help me along the way. And I also have the opportunity to set aside time, energy and resources for self-care. I have been listening to my body and doing more yoga, going for hikes and listening to energizing and inspiring podcasts. I have been spending time with my nieces and nephews – talk about therapy! They bring me crazy amounts of joy and their giggles are pure magic. I am also just trying to give myself over to the process. Whether it be health or relationships or career, I have to trust that it WILL all work out. Perhaps not in the way I pictured or wished for. But in some way or another it will be okay. I imagine a crossroads up ahead where luck and hard work will intersect and I achieve what I am striving for. I just have to keep my eyes open and be willing to flex and bend and yield.

Now, I don’t have a witty or thoughtful segue to this recipe so…..gingerbread!!

img_2962

Gingerbread was the inspiration for this recipe. Gingerbread and eggnog. Essentially, I am in full on Christmas mode and wanting to devour the sights, sounds and flavours of the season at any chance possible. It started with making multiple batches of peppermint bark for gatherings in recent weeks, checking out the Milton Santa Claus Parade last weekend and  then going  to the Trans Siberian Orchestra with my family a few days ago. The Christmas spirit has been ignited. 

img_2907img_2958

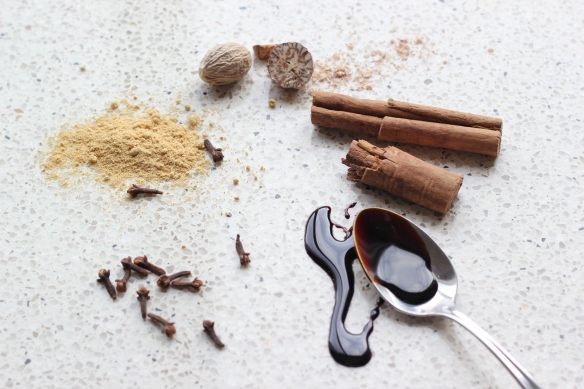
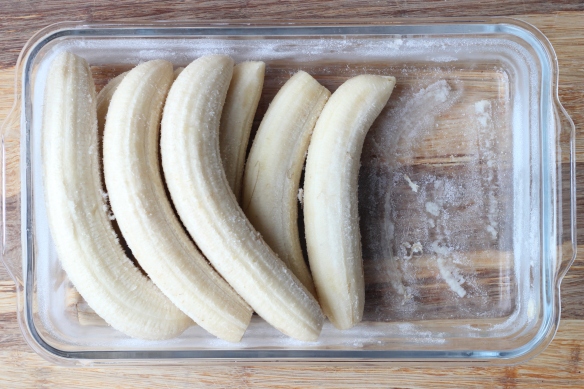
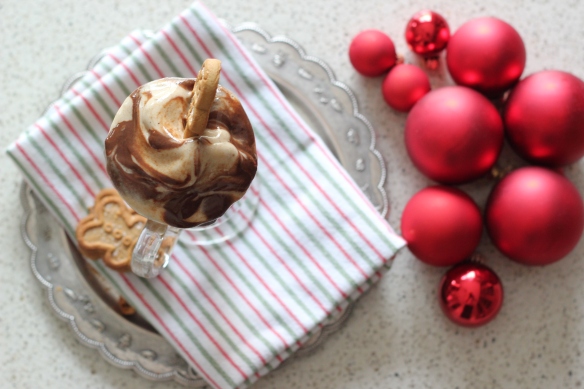
This is called nicecream because in using only plant-base ingredients it’s a kind way to consume  ice cream without using dairy milk. And it’s nice. Really really nice. And kind of magical, because who knew that frozen bananas can yield something smooth and creamy and cold and so akin to real ice cream that you might not miss the real thing. And it’s also super healthy, because it’s  just fruit! I paired the nicecream with eggnog flavours and topped it all with a gingerbread chocolate sauce, which is a gingerbread-spiced version of my original chocolate sauce. I haven’t posted the recipe for the original sauce on this blog yet but people went nuts about it when I shared it on Instagram and Facebook. I guess people care about a chocolate sauce that is free from refined sugar, made from wholesome ingredients and versatile (you can use it as a fruit dip, on top of oatmeal, as a base for hot chocolate etc.) And because it’s chocolate. This version is filled with gingerbready spices and molasses – I use the blackstrap variety because they are a good source of iron and calcium, unlike other types of molasses. So there you have it, chocolate, eggnog, gingerbread, nicecream, Christmas. Enjoy!

 img_2975img_2999


Eggnog Nicecream with Gingerbread Chocolate Sauce

vegan, gluten-free, soy-free, refined sugar-free 

Makes 2 servings of nicecream +  approximately 1 1/2 cups of chocolate sauce

Prep Time 10 minutes

Ingredients for nicecream:

4 ripe bananas, frozen, roughly chopped

1 teaspoon pure vanilla extract

3/4 teaspoon ground cinnamon

1/2 teaspoon freshly grated nutmeg

small pinch of ground cloves

1 Tablespoon maple syrup optional)

Directions:

1.       Add bananas and vanilla into a food processor and process until a creamy, soft-serve ice cream consistency . This will take a few minutes, and at first will resemble a coarse, crumbly mixture. Keep processing and scraping down sides often until you get nicecream. Add spices and maple syrup (if using) and process for a few seconds until combined.

2.       Spoon into serving dishes, top with gingerbread chocolate sauce and enjoy right away.

Ingredients for the gingerbread chocolate sauce:

8 soft medjool dates, pitted

6 Tablespoons cocoa or cacao powder

1 Tablespoon virgin coconut oil

1/2 teaspoon pure vanilla extract

1 Tablespoon blackstrap molasses

1/2 teaspoon ground ginger

1/2 teaspoon ground cinnamon

1/4 teaspoon freshly grated nutmeg

1/8 teaspoon ground cloves

pinch of sea salt

1 cup warm water

Directions:

1.       Place all ingredients in a blender and blend until smooth.

2.       Store in an air tight jar in the fridge for up to one week. The coconut oil might solidify in the fridge, just heat in the microwave or by running sealed jar under hot running water to melt.

Notes:

I keep a stash of whole, frozen bananas in the freezer; they break up or chop easily even when frozen. You want them to be ripe, with black spots on the skin (but not mushy or brown inside) when you freeze them.

I used Mi-Del gluten-free Gingerbread Men for decoration. So adorable!

img_3012

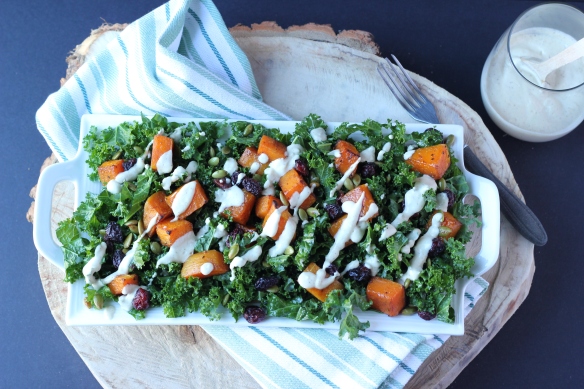
Harvest Kale and Roasted Butternut Squash Salad with Creamy Maple-Cider Dressing

img_2630

Here’s what I know about kale. It is hardy. It stands up to a greater breadth and depth of temperature, seasons and wind than any other vegetable in our garden. It thrives far longer (it continued to spill its harvest into the frigid mornings of mid-November.) It nourishes and satiates. It gives and weathers and feeds. And it needs little sustenance in return. Talk about a superfood with super powers! What I also know about kale is that I’ve been eating it for FAR longer than it has been basking in the glowing light of superfood status. My grandmother, aunts and mom have been growing and using kale in their kitchens for as long as I can remember. And while I don’t think they ever imagined its dominance as the queen of greens, they certainly knew its value. Easy to grow. Easy to cook. Easy to transform.

img_2599

img_2609

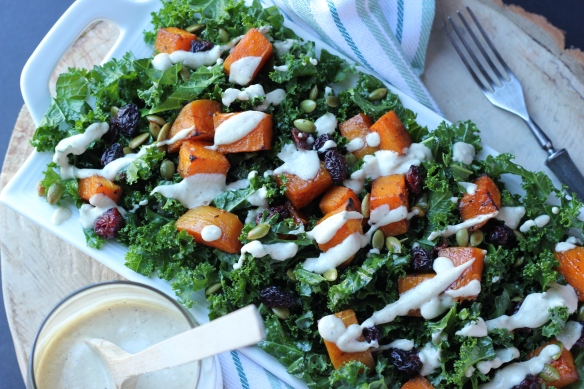
Onto this glowing recipe. Kale salad is nothing new. I’ve been making versions and incarnations of it for many years. Sometimes as the star player and sometimes as a companion to other greens. This salad though is all about the kale. It is home-grown kale paired with classic autumn ingredients to create a hearty, addictive and delicious appetizer or meal. I do highly recommend massaging the kale for this dish. Yup, that sounds ridiculous, I know. But really, it makes a difference. If you’ve ever had dry, woody kale in your salad you will appreciate this step. And doesn’t this hard working produce staple deserve a little R and R?? You’re welcome kale.

img_2652img_2640

The first few times I made this recipe I used delicata squash which works beautifully. But as luck would have  it, delicata was nowhere to be found on my grocery expedition this time. So butternut squash played the perfect understudy. And really any squash or pumpkin would do. I do love serving this salad with the squash still warm from the oven. The warmth is a great foil for the kale and sets off the zingy dressing nicely, but room temperature is just fine. Straight from the fridge the next day works too. And yes, this salad is the kind you can eat as leftovers, nothing gets soggy!

img_2680

I usually serve all the ingredients layered on a large platter or wide, shallow bowl with the dressing on the side so people can drizzle on as much as they want but feel free to do the drizzling yourself. Or just mix all the salad ingredients with the dressing. This recipe  might make more dressing than you will need but that’s not a bad  thing. It’s perfect on other greens or roasted veggies.

A hearty, warm, vibrant salad to nourish and chase away the impending winter blahs. Oh, I should say this recipe makes a pretty hefty  party sized salad. So you can always halve the quantities to make a smaller amount. But like I said, you can keep it in the fridge for a couple of days with nothing to worry about. And then change it up with some cooked quinoa or millet, or alongside a spicy soup or stew.

Harvest Kale and Roasted Butternut Squash Salad + Creamy Maple-Cider Dressing

vegan, soy-free, gluten-free

Makes a party sized salad

Prep Time 20 minutes

Cook Time 35-40 minutes

Ingredients for the salad:

2 bunches of kale, washed, ribs removed, chopped into bite sized pieces (about 12 cups)

1 butternut squash, peeled and cubed (about 8 cups)

2 Tablespoon extra virgin olive oil, divided

1  Tablespoon apple cider vinegar

1.5 Tablespoons maple syrup

1 teaspoon salt

1/2 teaspoon freshly ground pepper

1/2 teaspoon ground cinnamon

1/4 teaspoon ground cloves

3/4 cup raw pumpkin seeds

3/4 cup dried cranberries, chopped

1 batch of creamy maple-cider dressing

Directions:

  1. Preheat oven to 450ËšF. Line a large rimmed baking sheet with parchment paper.
  2. In a large bowl drizzle the kale with one tablespoon of olive oil and the apple cider vinegar. Gently squeeze and massage the kale until thoroughly coated with the oil and vinegar. Set aside.
  3. Place the squash on the baking sheet, drizzle with one tablespoon of olive oil, all  of the maple syrup, salt, pepper, cinnamon and cloves, and toss to combine. Arrange in a single layer and roast for about 35-40 minutes, flipping once halfway through cooking time. Squash should be cooked through and browned around the edges.
  4. Heat a medium skillet over medium-high heat, add pumpkin seeds and toast until starting to turn golden and fragrant, about 3-5 minutes. Stir frequently so that they don’t  burn. Transfer onto a plate and let cool.
  5. To assemble the salad, place the massaged kale onto a platter or bowl, top with toasted pumpkin seeds, dried cranberries and roasted squash. Drizzle or toss with about 1/2-3/4 of the dressing and serve with extra dressing on the side.

Ingredients for the dressing:

1/2 cup extra virgin olive oil

1/2 cup apple cider vinegar

2 Tablespoons maple syrup

2 Tablespoons tahini

1 clove of garlic, peeled

1 teaspoon salt

1/2 teaspoon freshly ground pepper

1/8 teaspoon ground cloves

6-8 Tablespoons water

Directions:

  1. Combine all ingredients and 6 tablespoons of the water in a blender and  blend on high until emulsified. Add extra water as needed to achieve a pourable consistency.

img_2736